Pathologic 2
Blender Model Tutorial
Update
You can now download the models through this Google Drive folder. Thank you to RoarkAnimations (Youtube, Twitter) for archiving these and allowing me to share them with everyone.
I've also added the Bachelor's retail model (different from the alpha model that rotten-eye had ripped), the Webley revolver, General Block, and the Polyhedron to that folder.
Summary
These pages contain information on how to download, unpack, set up, pose, and render rotten-eye's Pathologic 2 models in Blender.
If you'd like, you can also view the Pathologic 2 Character Turntables I've made using these models.
You can also view this tutorial as one page.
Table of Contents
- Software needed
- Downloading and Unpacking Models
- Setting Up Models in Blender
- Posing
- Rendering
- Output Settings
- Setting up Cameras
- Lighting with HDRIs / World Shader Nodes
- Animating a Turntable
- Rendering the Turntable
- Looping Turntables in Davinci Resolve
Setting up Cameras
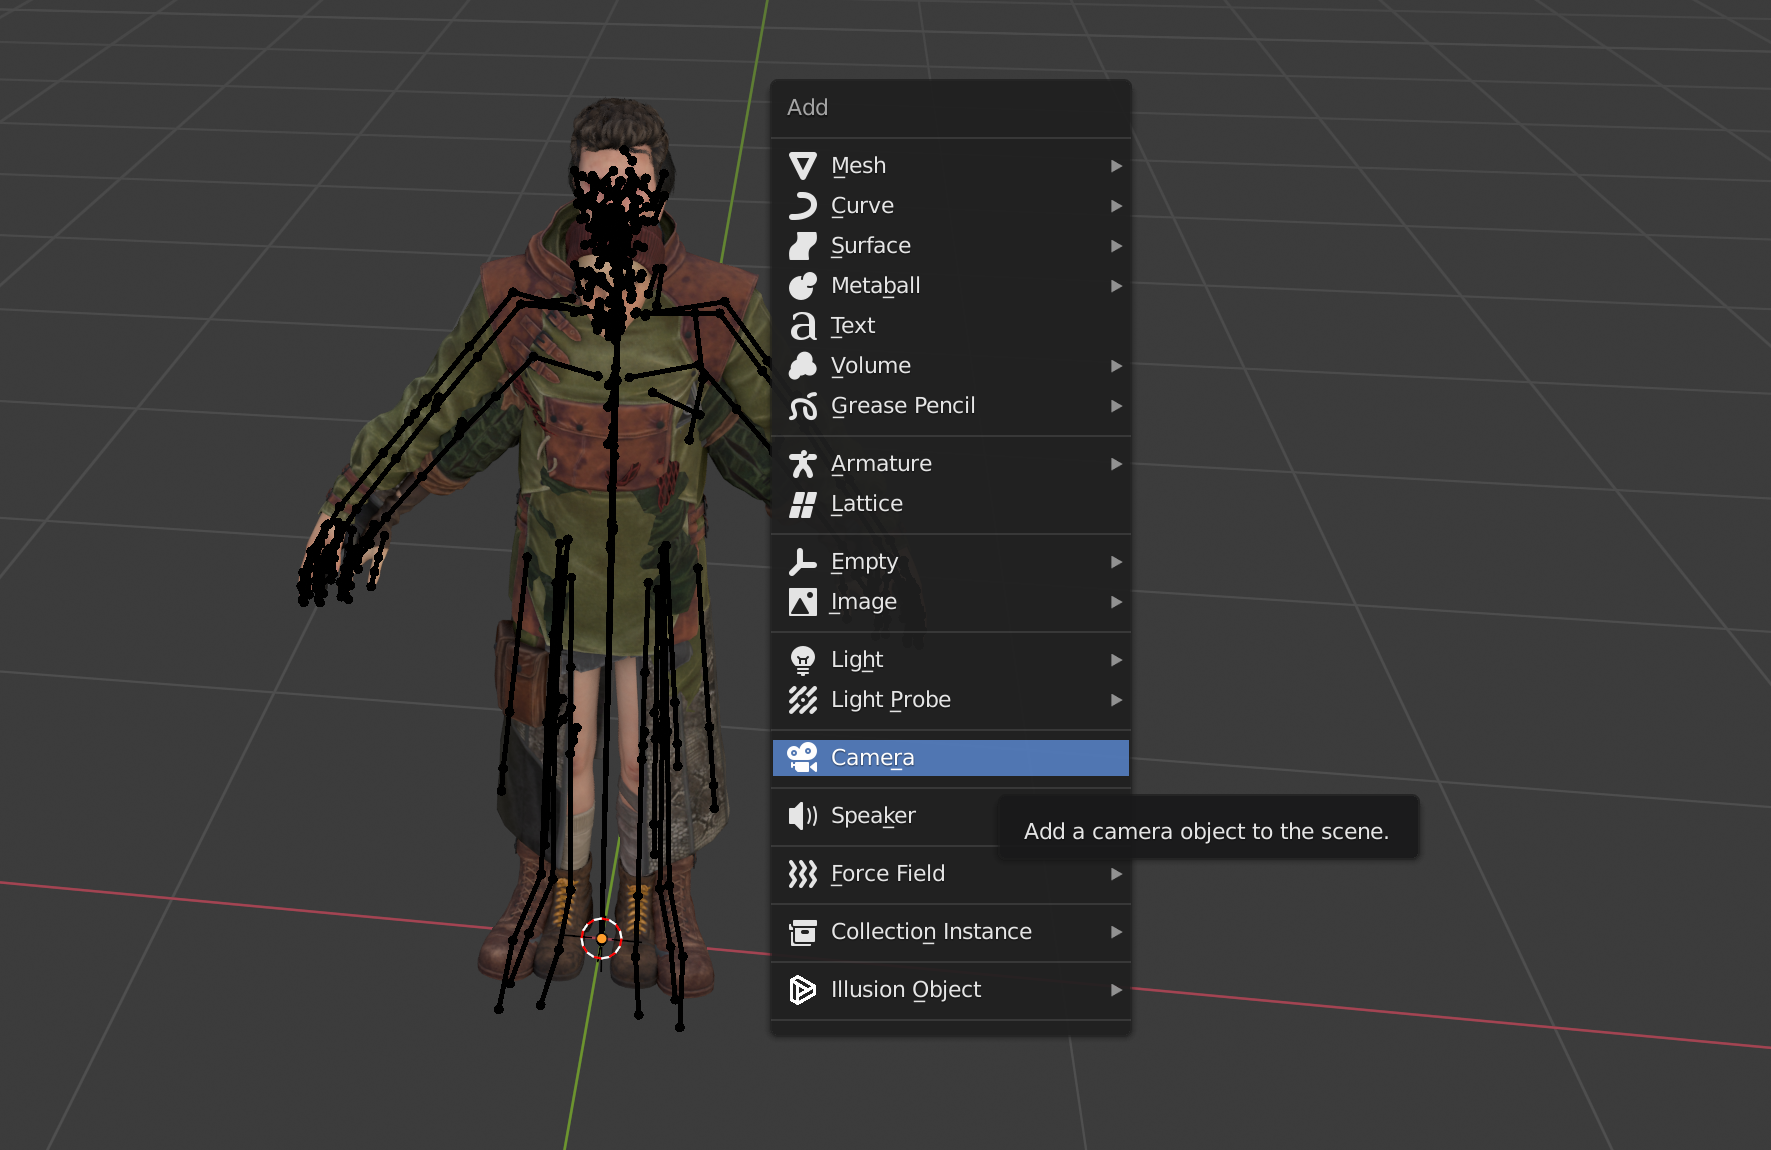
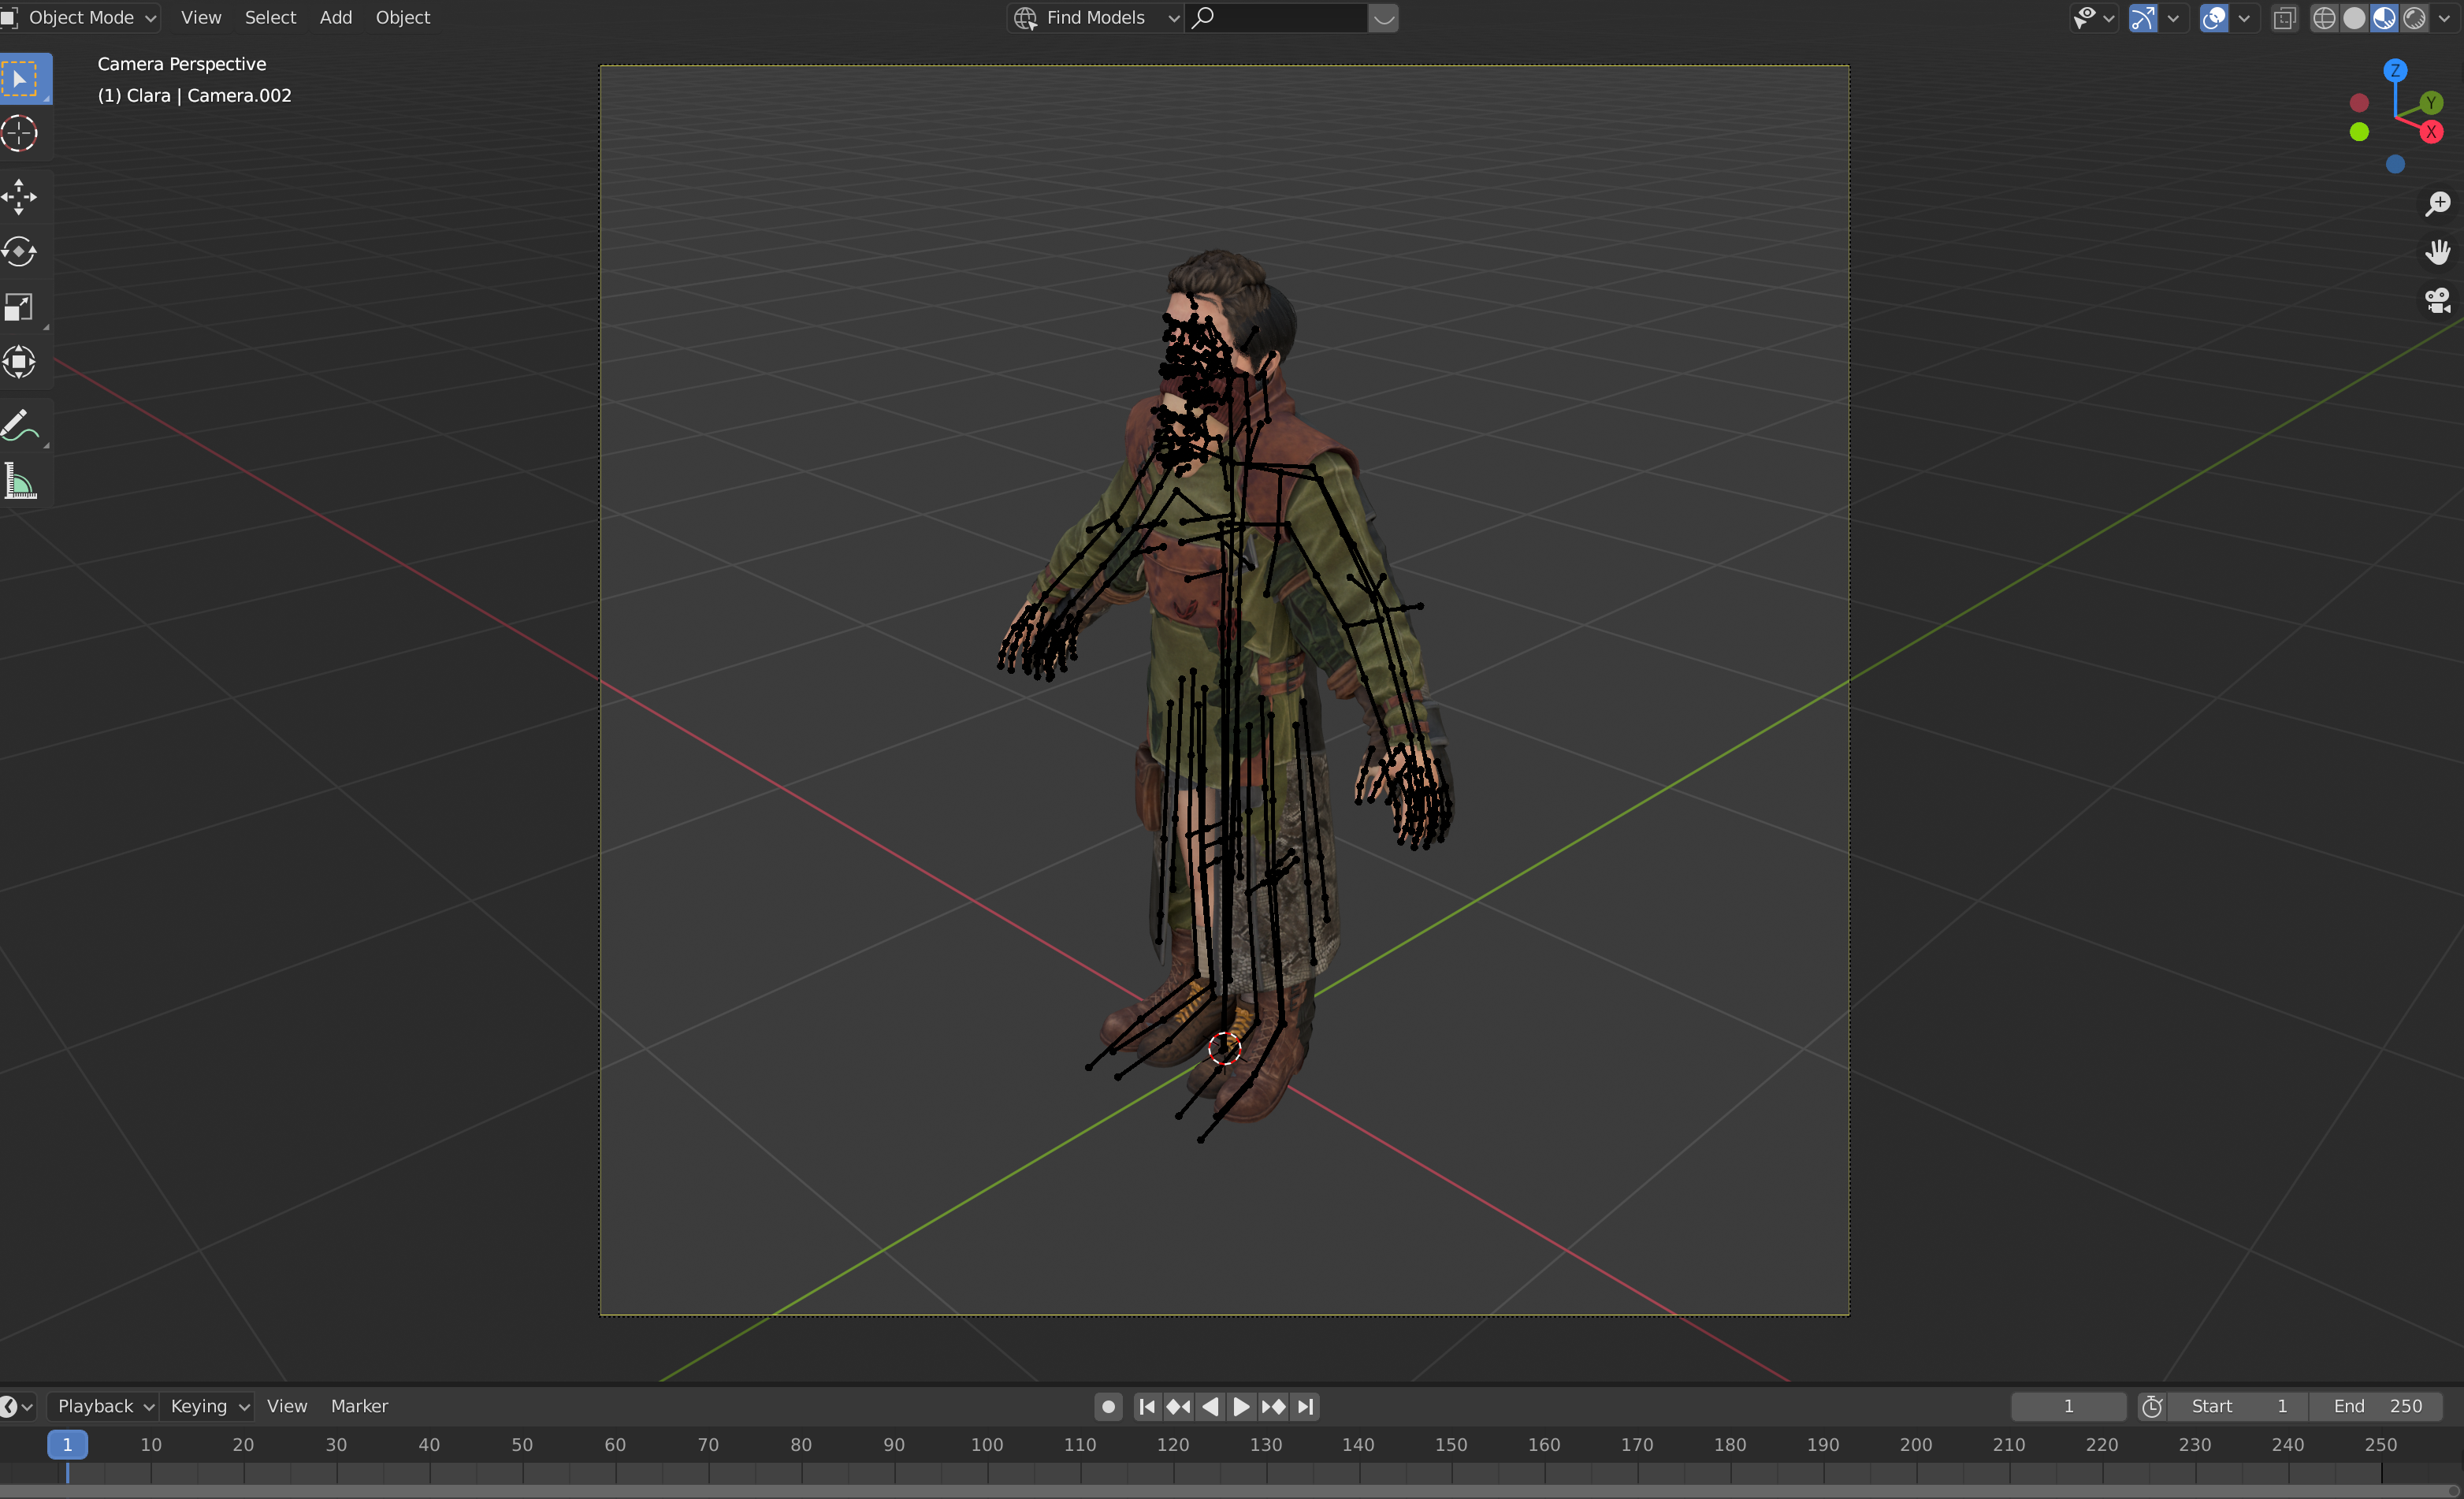
To add a camera, press shift + A while having your mouse in the 3D Viewport. A menu will pop up, and you can select Camera from here. Towards the bottom left, you will see a collapsed menu pop up that says "Add Camera". If you open it, you can change the location and rotation values. You can also do this later by moving the camera around in the 3D viewport with G (Grab), or R (rotate). You can also edit it in the Object properties, which is the tab with the "orange box with corner pieces" icon.
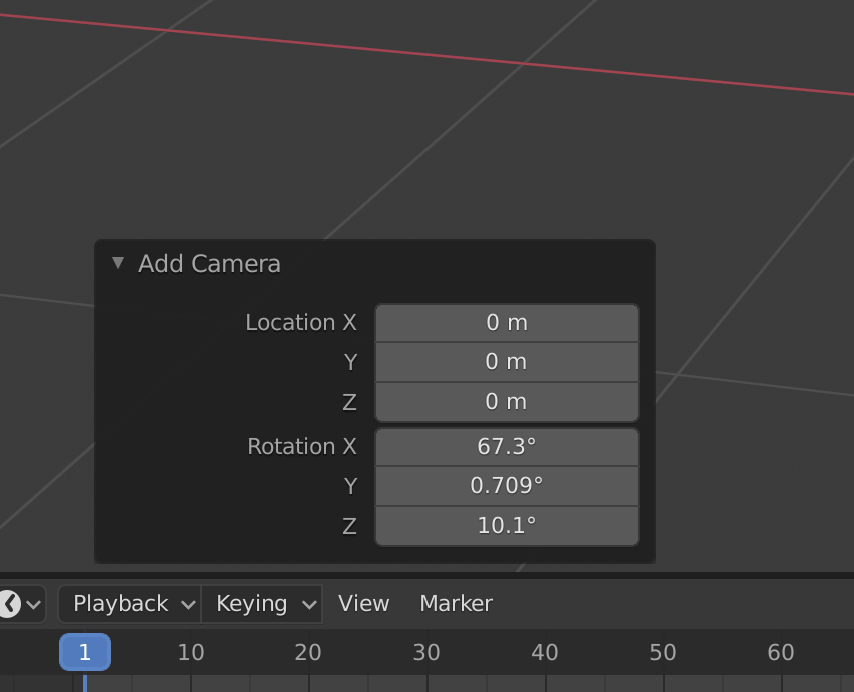
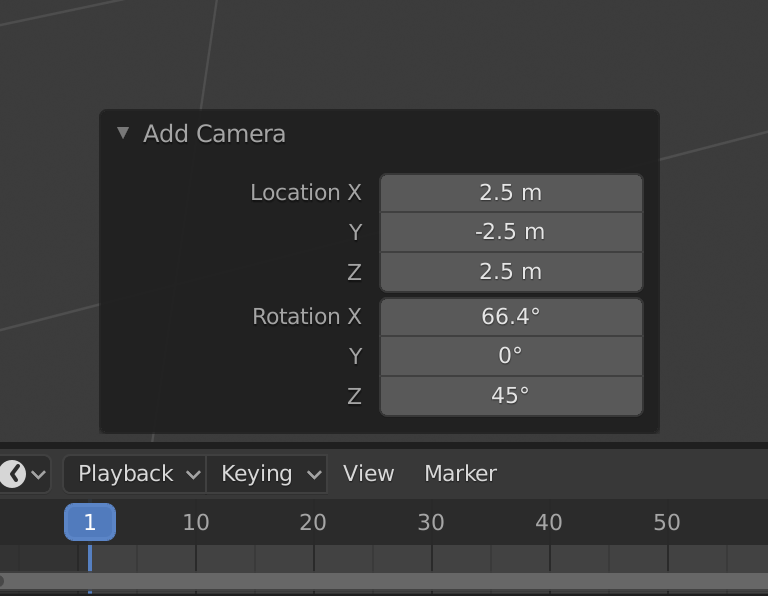
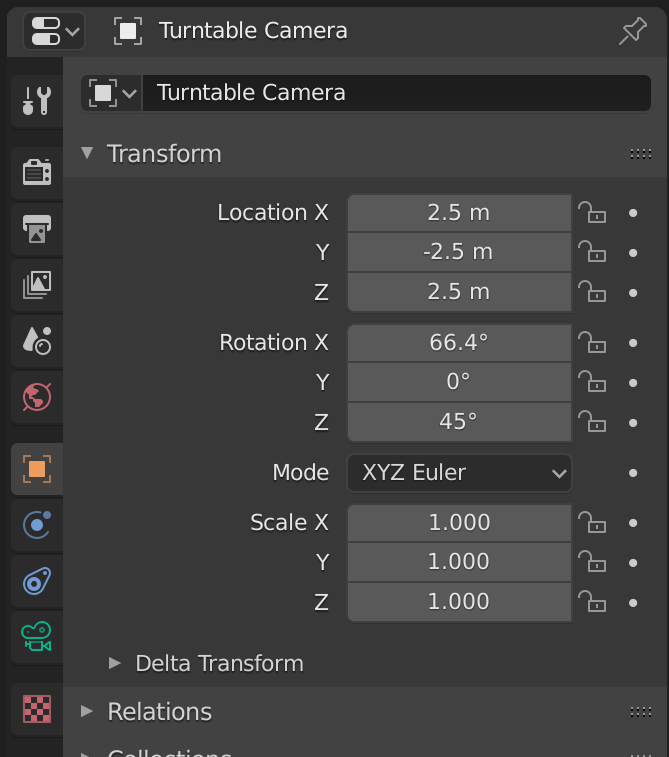
The values I'll be using for the turntable are as follows:
Location X: 2.5m
Location Y: -2.5m
Location Z: 2.5m
Rotation X: 66.4°
Rotation Y: 0°
Rotation Z: 45°
If we toggle to the Camera view by pressing the camera icon on the top-right section of the Viewport, we can see how the Camera is positioned. This is not the render view: it currently has simulated lights and a world environment, as well as a bunch of interface elements like armatures and the 3D Cursor.
We can also see the same values we just typed in the Object Properties tab.
Before we make more changes to the scene, we should rename our camera. It might also be hidden within one of the character collections, so just find it and drag it out onto the overarching "Collection" folder. I'm calling it "Turntable Camera".
You can see that the green camera icon after the name is highlighted, which means it is the active camera that the renderer will use. If you have multiple cameras, you can select this icon in the Scene Collection to switch between them.

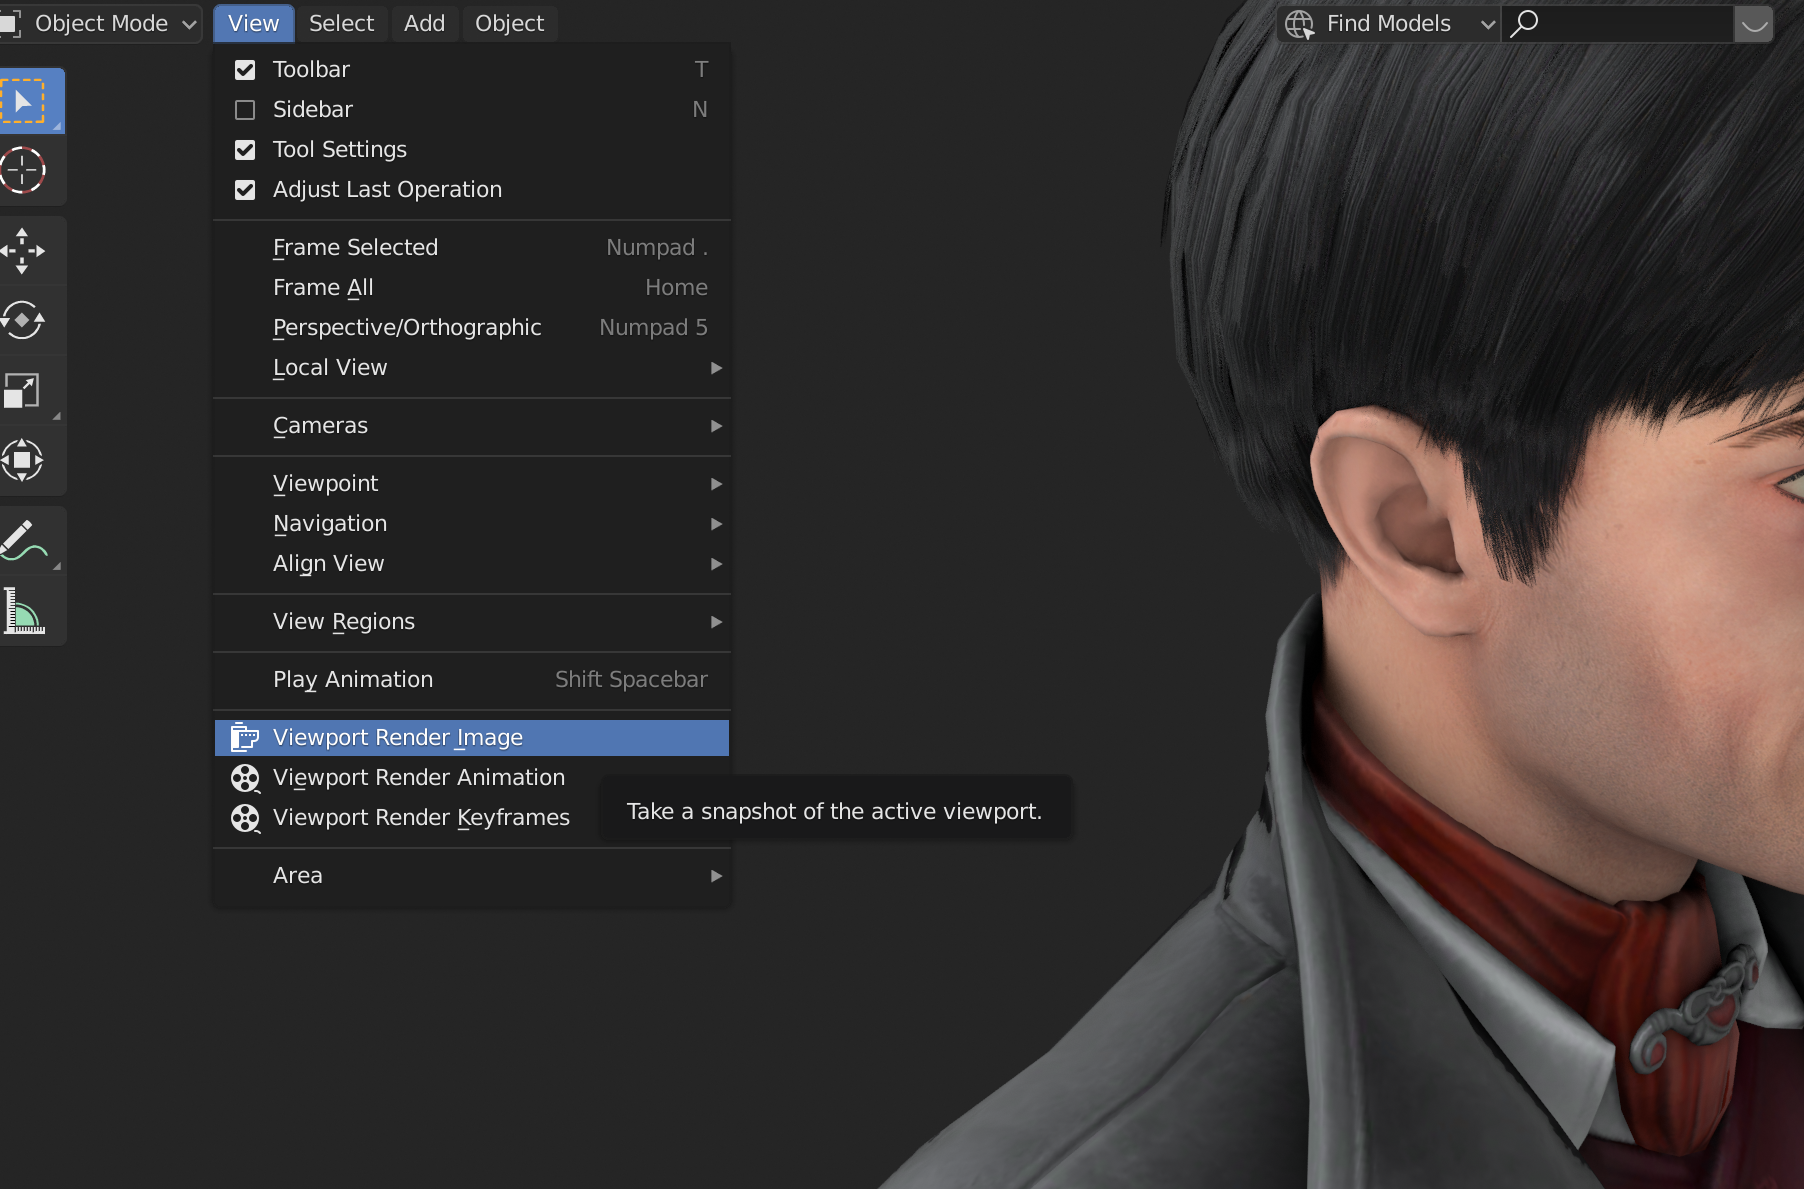
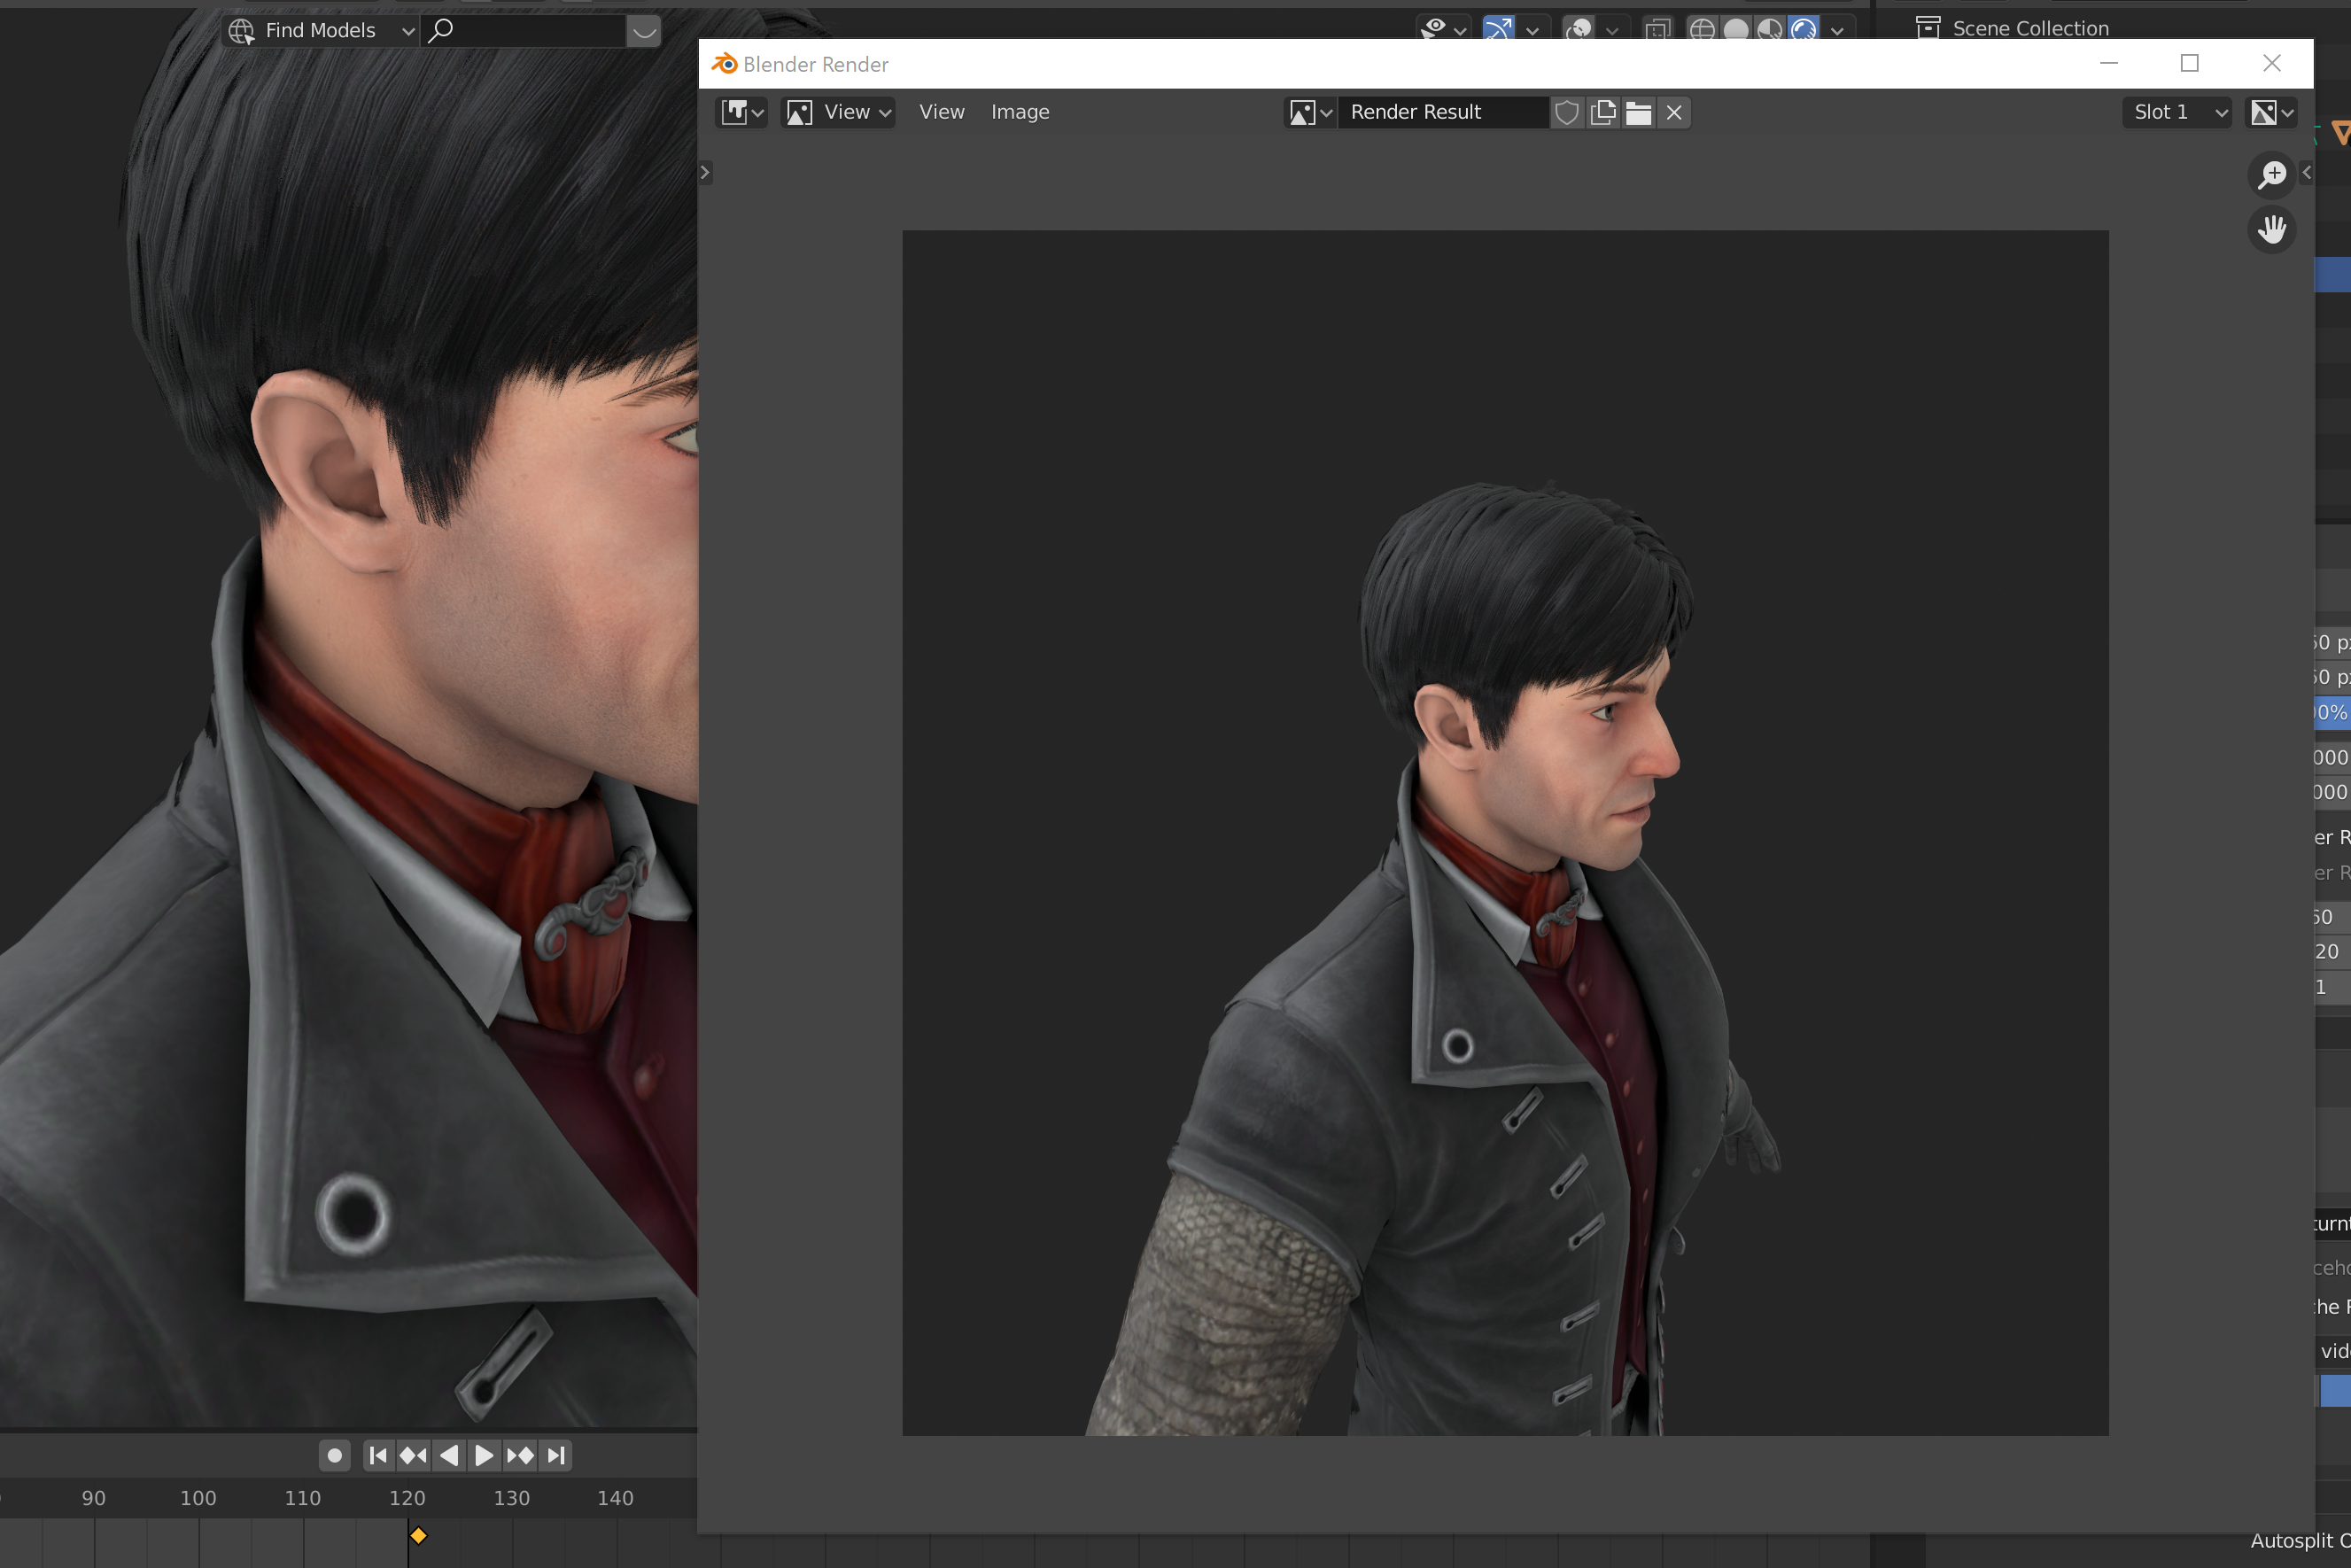
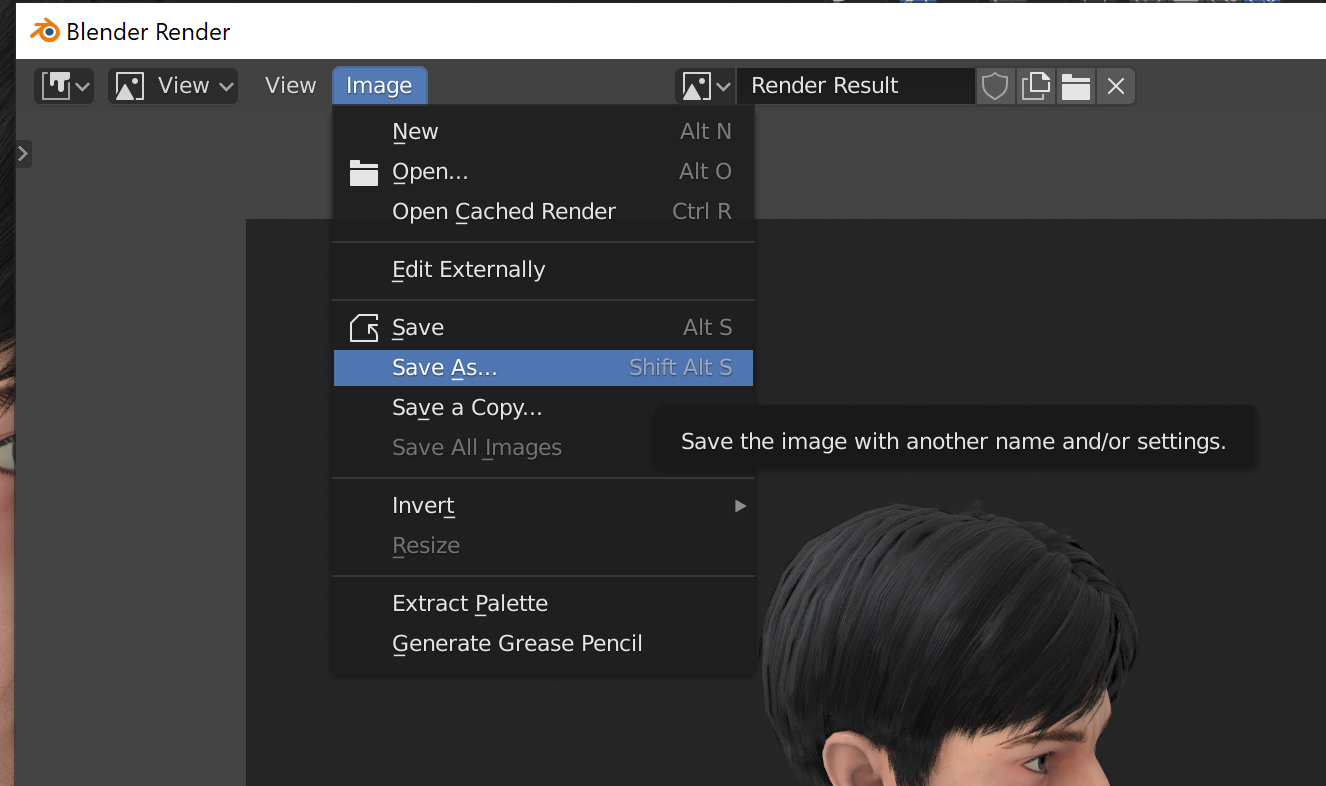
If you'd like to render an image at the angle that you're at in the viewport without setting up a camera, you can go to View / Viewport Render Image, right at the top-left of the 3D Viewport. This image will be rendered at the dimensions of your active camera, which is the only caveat. You can save this image by going to Image / Save As in the render pop up.
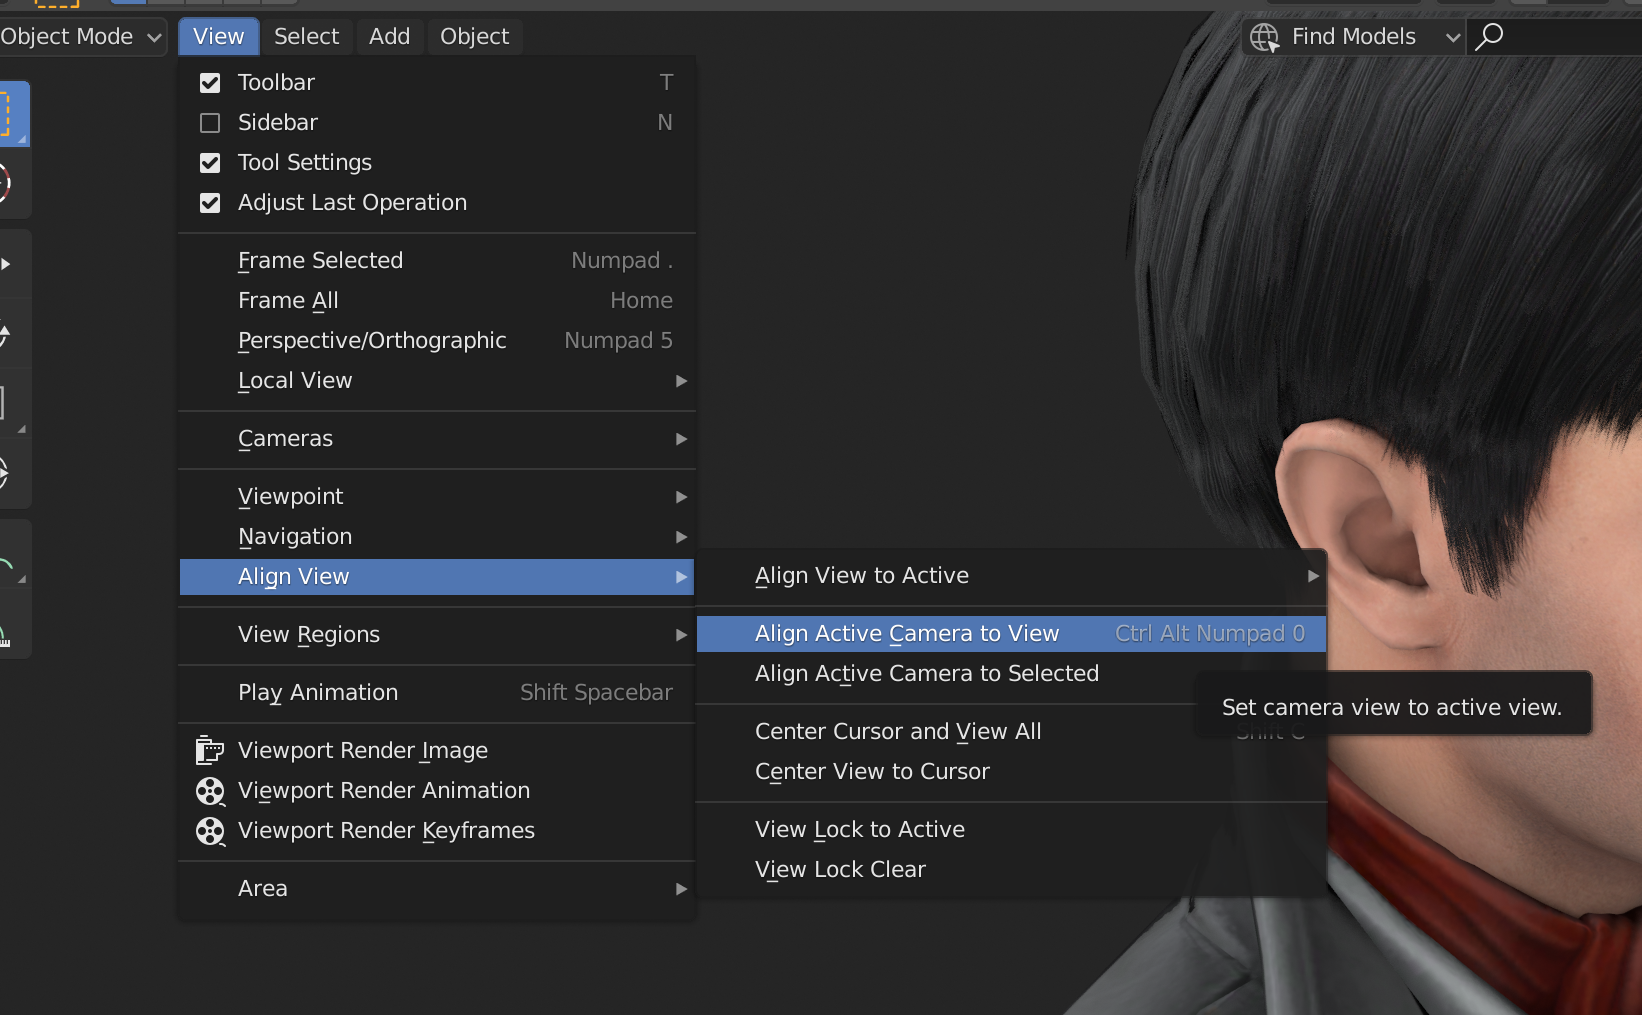
Conversely, you can also snap the current active camera to your angle in the viewport by going to View / Align View / Align Active Camera to View. Just make sure to add a new camera and make it the active one if you want to preserve your old one.