Pathologic 2
Blender Model Tutorial
Update
You can now download the models through this Google Drive folder. Thank you to RoarkAnimations (Youtube, Twitter) for archiving these and allowing me to share them with everyone.
I've also added the Bachelor's retail model (different from the alpha model that rotten-eye had ripped), the Webley revolver, General Block, and the Polyhedron to that folder.
Summary
These pages contain information on how to download, unpack, set up, pose, and render rotten-eye's Pathologic 2 models in Blender.
If you'd like, you can also view the Pathologic 2 Character Turntables I've made using these models.
You can also view this tutorial as one page.
Table of Contents
- Software needed
- Downloading and Unpacking Models
- Setting Up Models in Blender
- Posing
- Rendering
- Output Settings
- Setting up Cameras
- Lighting with HDRIs / World Shader Nodes
- Animating a Turntable
- Rendering the Turntable
- Looping Turntables in Davinci Resolve
Output Settings
You can easily pose models in Blender, take screenshots of the 3D Viewport, and use this for artistic reference. However, if you'd like to render animations or large images, there are a few things you need to set up.
First, you might want to activate ambient occlusion. This is optional, but sometimes models look undesirably flat without it. You can find this by clicking on the tab that has the gray "back of a camera" icon. It's the second one down.

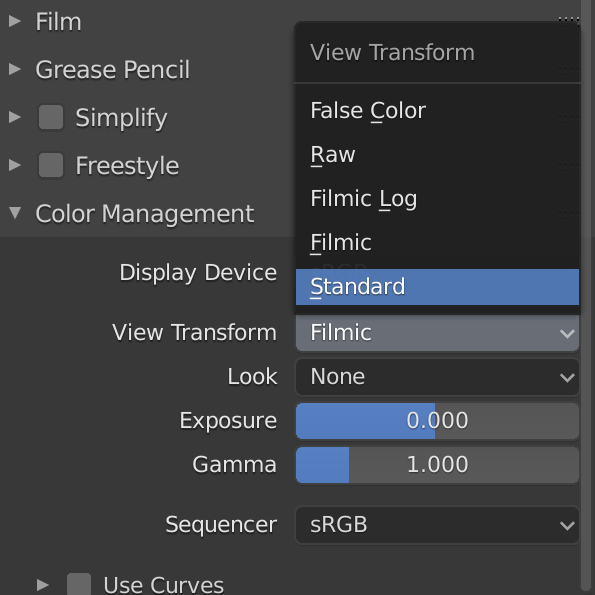
We will also change how colors are handled in this tab. Scroll all the way down to Color Management, and in View Transform, switch it from Filmic to Standard. By default, Blender uses Filmic, as it provides more natural colors and lighting for realisitc renders. However, it can also lead to everything looking muted and innacurate in stylized 3D work and reference models.
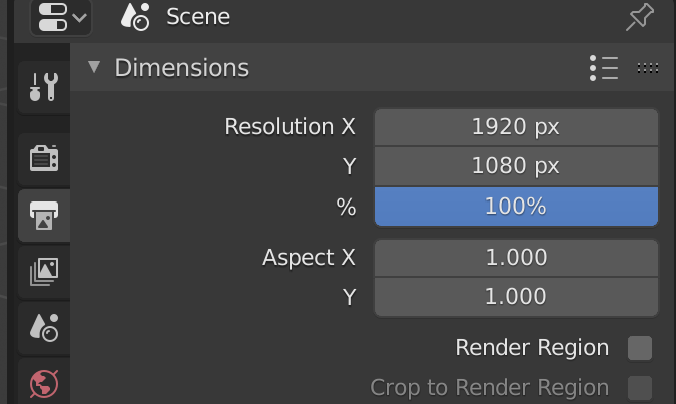
Now, we can leave this tab and go to the output tab. It's the one with the gray printer icon, just below the tab we were in before. The default render dimensions are 1920px by 1080px, and you can leave it as is if you want to render an HD, 16:9 aspect ratio image or video.
However, since I'll be showing you how to make a turntable, I'm going to type in a square aspect ratio. Since 2160px by 2160px is the largest square video that Davinci Resolve can render, that's the size I'm going with. However, you can also set it to 1920px by 1920px, or any other square sized you'd like.
Other 16:9 ratios that work well for videos and general posts on the internet are 3840px by 2160px (4k or UHD resolution), or 2560px by 1440px (2k or QHD resoluton).
The next thing we'll be looking at in this tab are the Output settings for animations. This includes both the destination of your render, and the file format. These settings are less important for still images, because we can always render an image and select the file format / destination when we finish.
We can render animations as image sequences (the individual, numbered frames of an animation, in any image format you'd like), or as a video file (such as an mp4, which can be uploaded to Youtube or Twitter without any further editing.)
Image sequences are preferrable, because if Blender crashes halfway through rendering an animation, you'll keep all of the images you've already rendered. You can then pick up where you left off by simply changing where the animation timeline starts, which I'll show you how to do later. Additionally, if you select an image format like PNG, the images will be nice and crisp and suitable for reference materials and artwork.
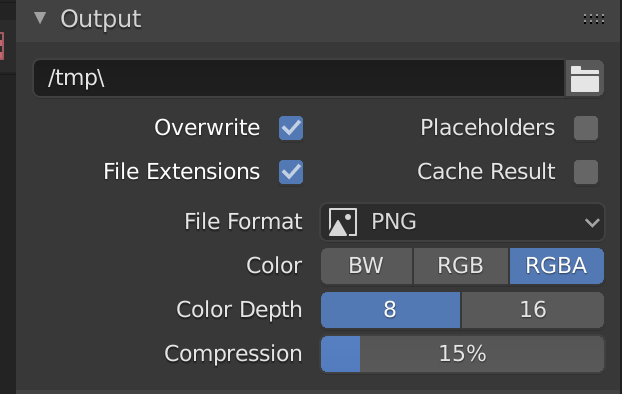
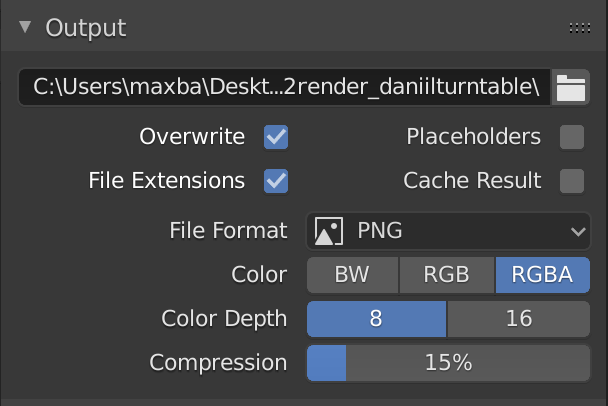
By default, Blender will send image sequences and videos to a temporary folder on your computer. You can change the location by clicking on the folder icon next to the folder name, and navigating to the right folder. I suggest creating individual folders for each render you want to make.
Also by default, Blender will render animations as PNG image sequences, and this is what I'll be using. However, if you'd like to render an mp4, you can change the file format to "FFmpeg video". This will add a new dropdown the Output section called "Encoding". In here, you can switch the container to MPEG-4.
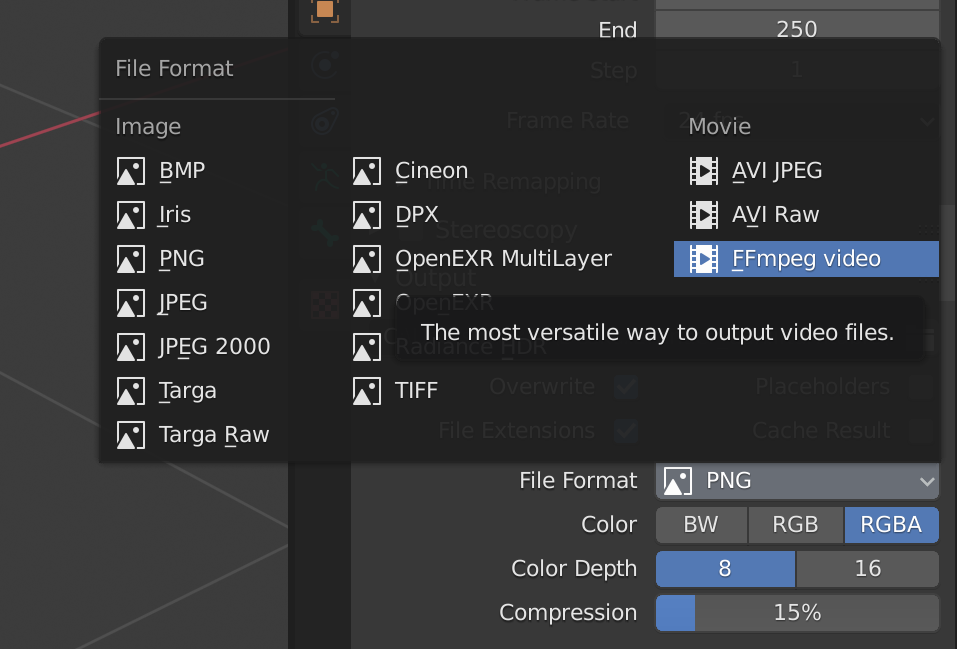
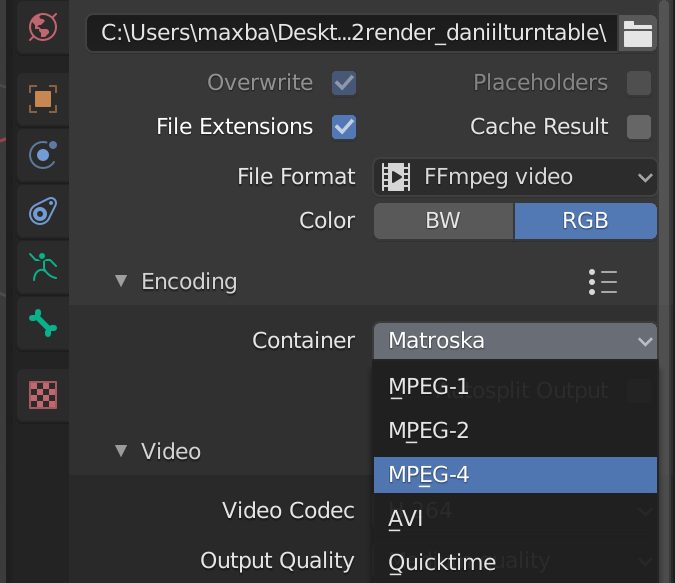
For now, I'll switch the file format back to PNG.
To render anything, you'll need to set up an active camera. I'll show you how to set one up specifically for a turntable, but I'll also show you how you can modify and move it around for anything, as well as how to render from your angle in the 3D Viewport.