Pathologic 2
Blender Model Tutorial
Update
You can now download the models through this Google Drive folder. Thank you to RoarkAnimations (Youtube, Twitter) for archiving these and allowing me to share them with everyone.
I've also added the Bachelor's retail model (different from the alpha model that rotten-eye had ripped), the Webley revolver, General Block, and the Polyhedron to that folder.
Summary
These pages contain information on how to download, unpack, set up, pose, and render rotten-eye's Pathologic 2 models in Blender.
If you'd like, you can also view the Pathologic 2 Character Turntables I've made using these models.
You can also view this tutorial as one page.
Table of Contents
- Software needed
- Downloading and Unpacking Models
- Setting Up Models in Blender
- Posing
- Rendering
- Output Settings
- Setting up Cameras
- Lighting with HDRIs / World Shader Nodes
- Animating a Turntable
- Rendering the Turntable
- Looping Turntables in Davinci Resolve
Materials: Clothing and Skin
To texture the models, we have to hook up three different textures to the different parts of the model.
The three textures are:
Diffuse / DIFF (base colors)
Specular / SPEC (shinyness)
Normal Map / NORM (additional 3D height information applied to a more simple 3D model.)
Generally, the different parts of the models are as follows:
Hair (Textures for hair are on one sheet, but the eyelashes and head hair models may be split up.)
Eyes
Mouth (Not visible when jaw is in resting closed position.)
Skin
Cloth (Textures for shirts, shoes, and jackets are on one sheet, but some jacket models are separate.)
With the exception of the hair, which I'll cover in the section below, the rest of these parts are hooked up in the Shading workspace the same way.
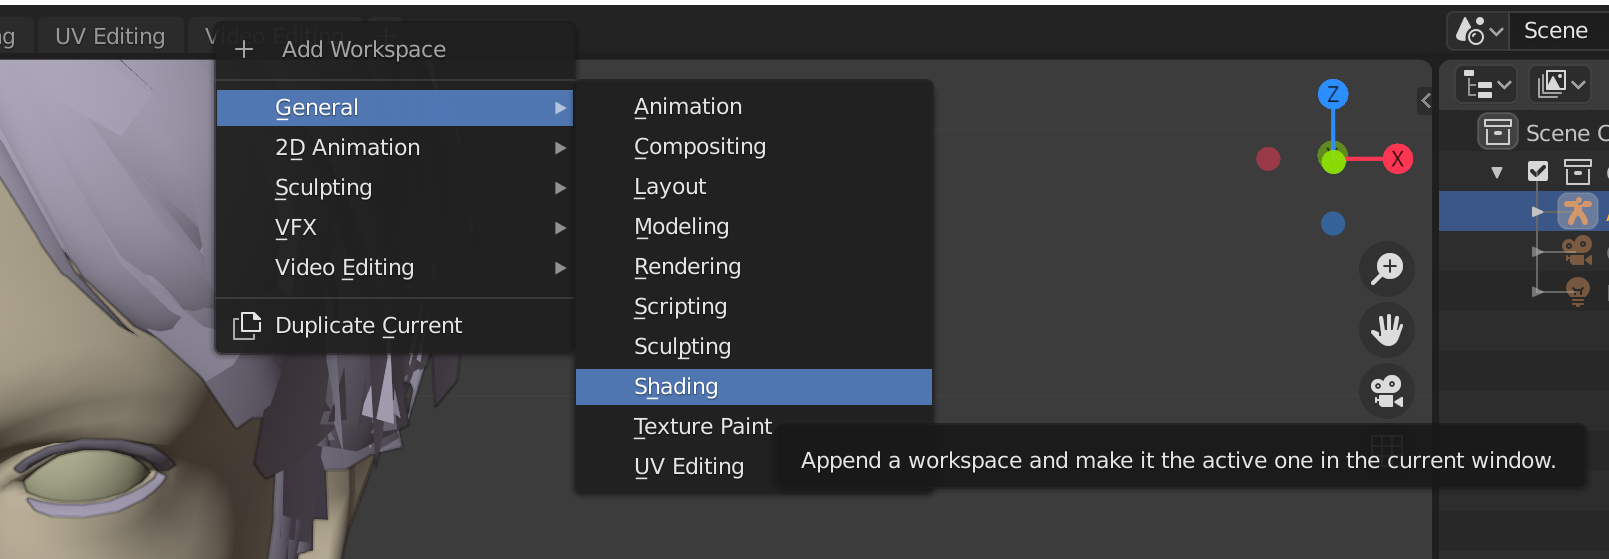
The model does not come with the workspace we need to hook these up. To get to this workspace, you can click the plus button on the top toolbar, then go to General / Shading
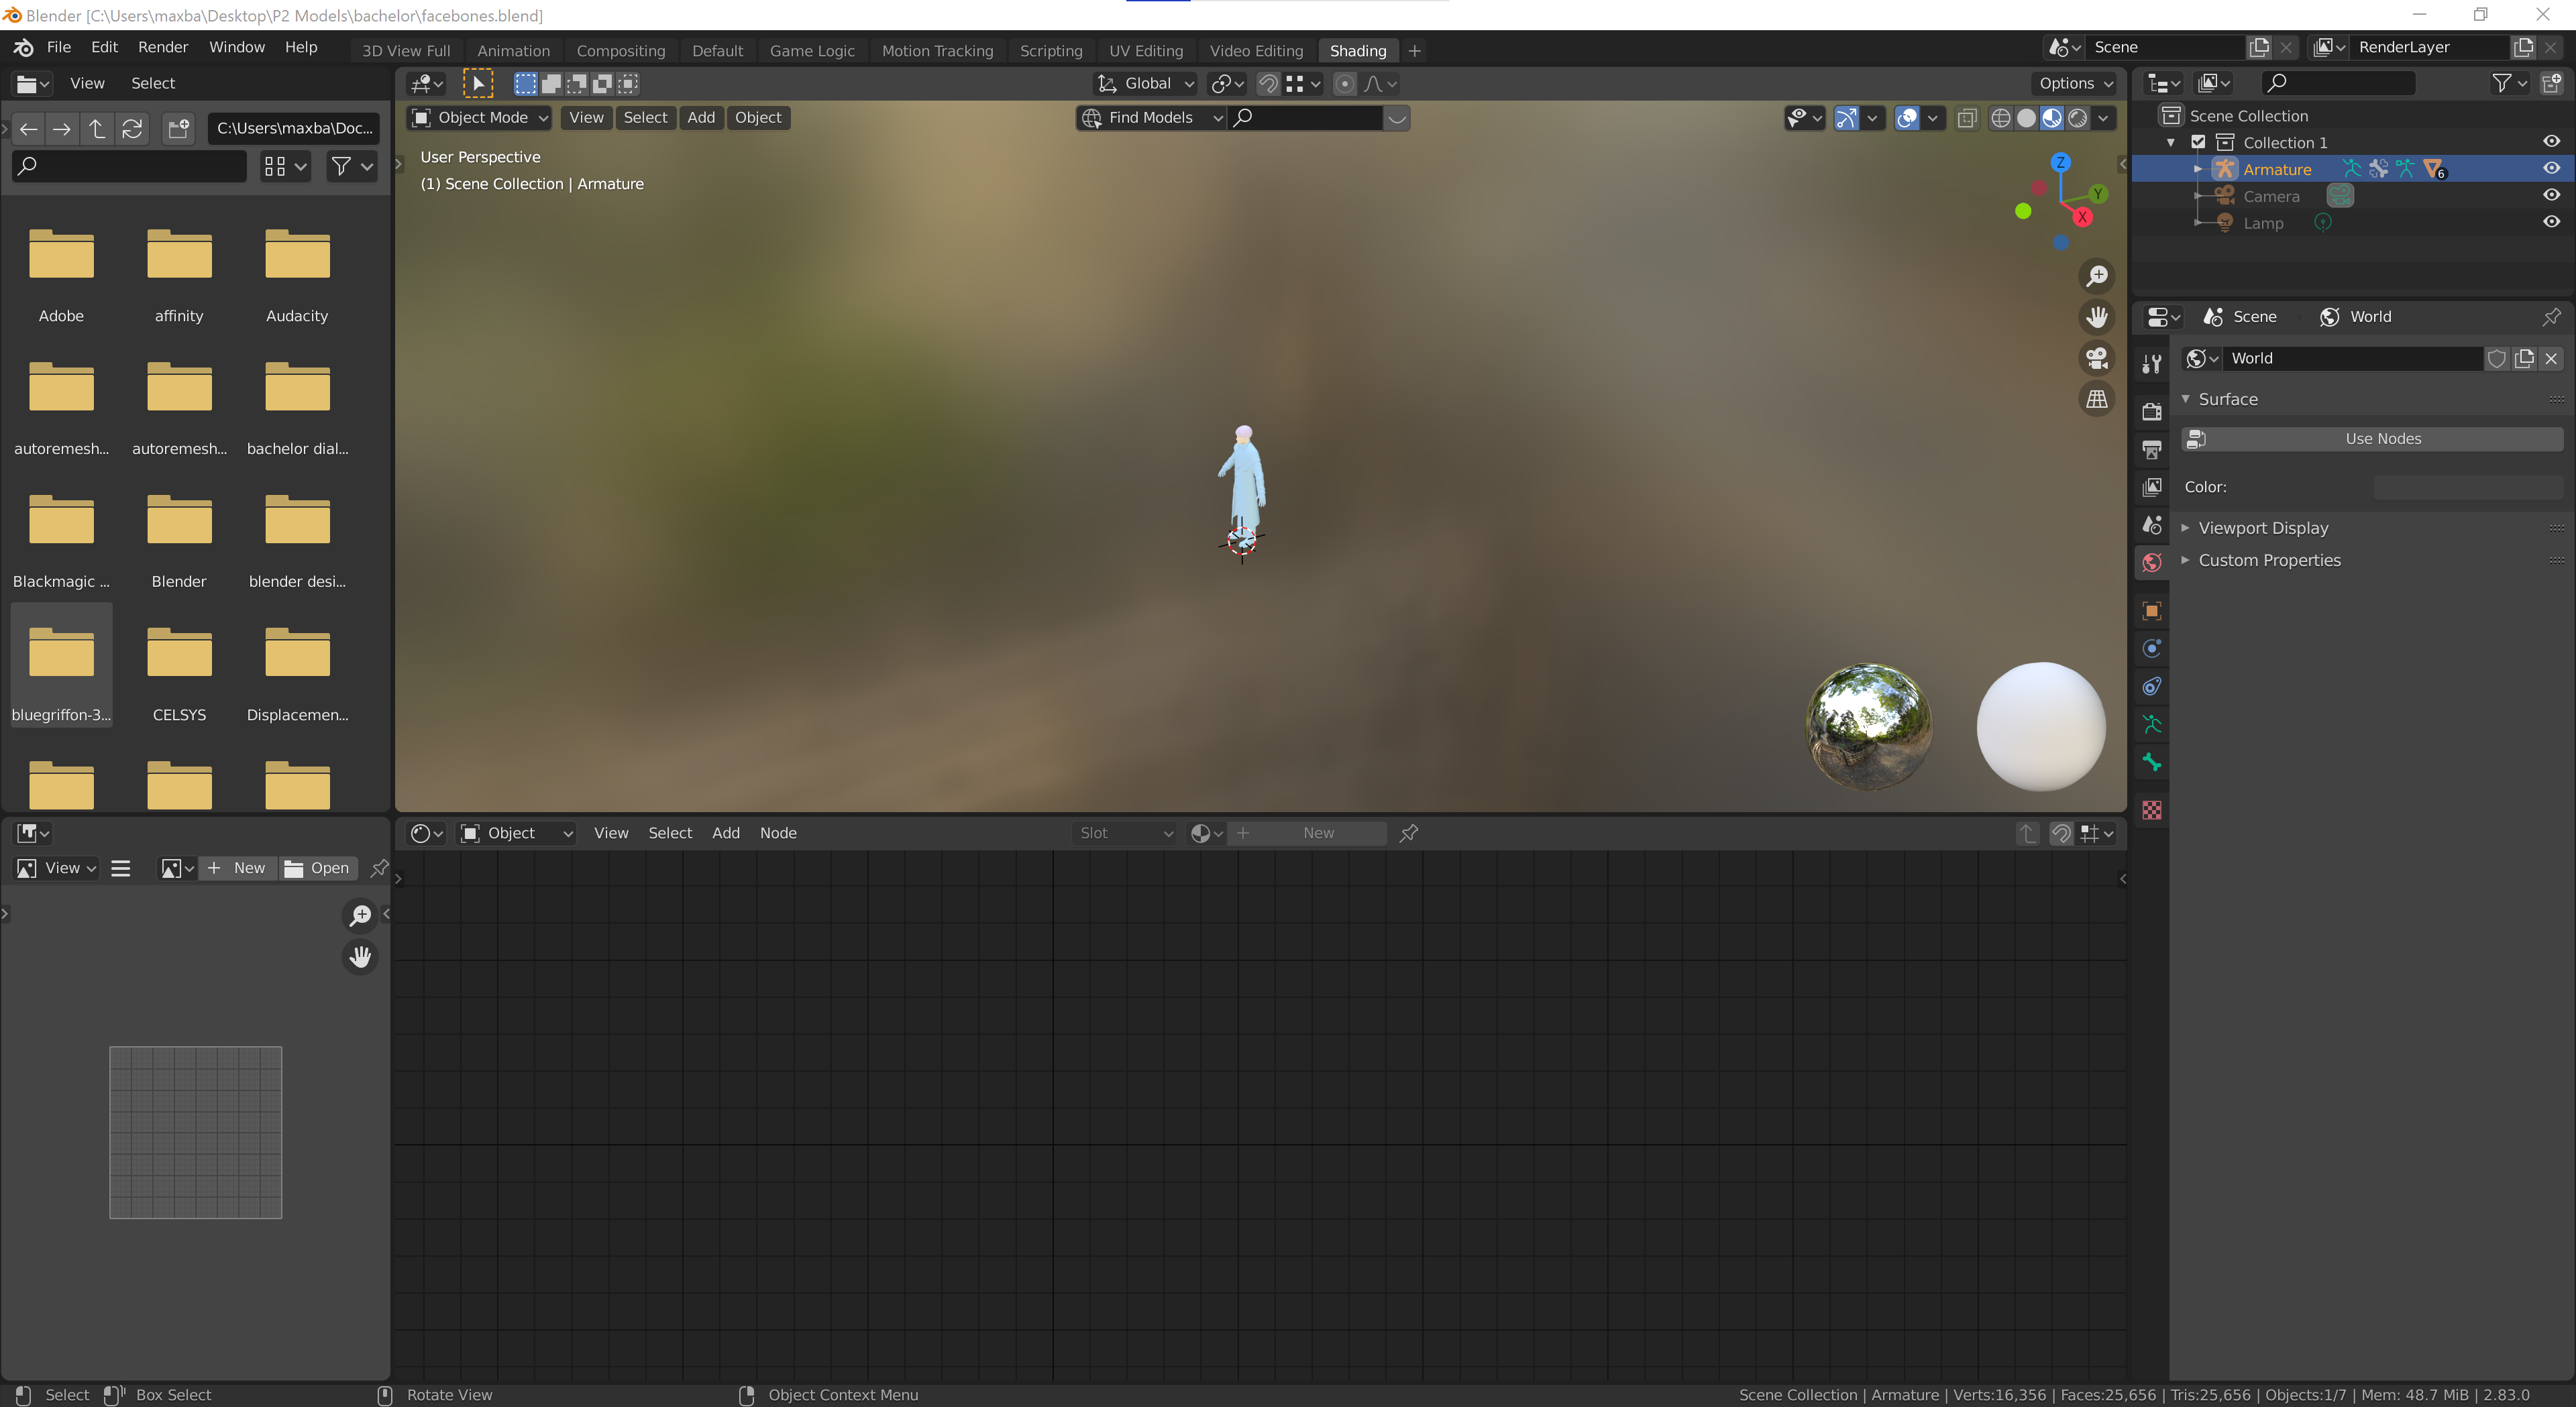
Now, we can start setting up the materials for each part of the character. You can see the different parts by clicking the down arrow on the "Armature" object in the Scene collection (top-right side of screen.)
You can also left click on different parts of the model in the 3D view. The Scene Collection just makes it easier to click on things sometimes, especially if they're hidden, like in the case of the mouth or the eyes.
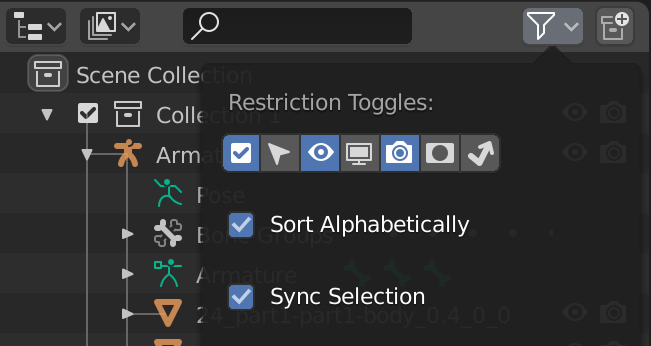
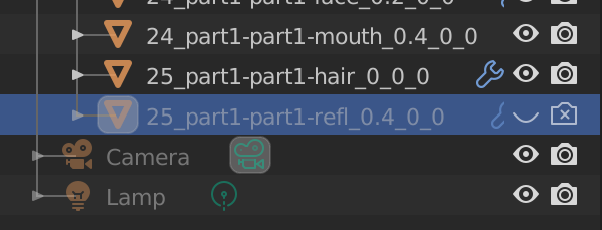
While you're here, you may want to hide or delete the eye reflection object, since we won't be using it. To hide the reflection object in both the viewport and renders, click the funnel icon on the top right, and select the camera icon under Restriction toggle. Then, hide both the eye and camera icon for the last object, "25_part1_-part1-refl_0.4_0_..."


After clicking on the first model part ("24_part1_part1-body_0.4_0_0..."), you'll see that the body is highlighted. In the Bachelor's case, this is his coat.
To start hooking up materials, we need to navigate to the Materials tab. This is found in an area underneath the Scene Collection, to the bottom right. There are several tabs here, but the one you want right now is the tab with the pink icon that looks like a sphere with a checkerboard pattern inside of it.
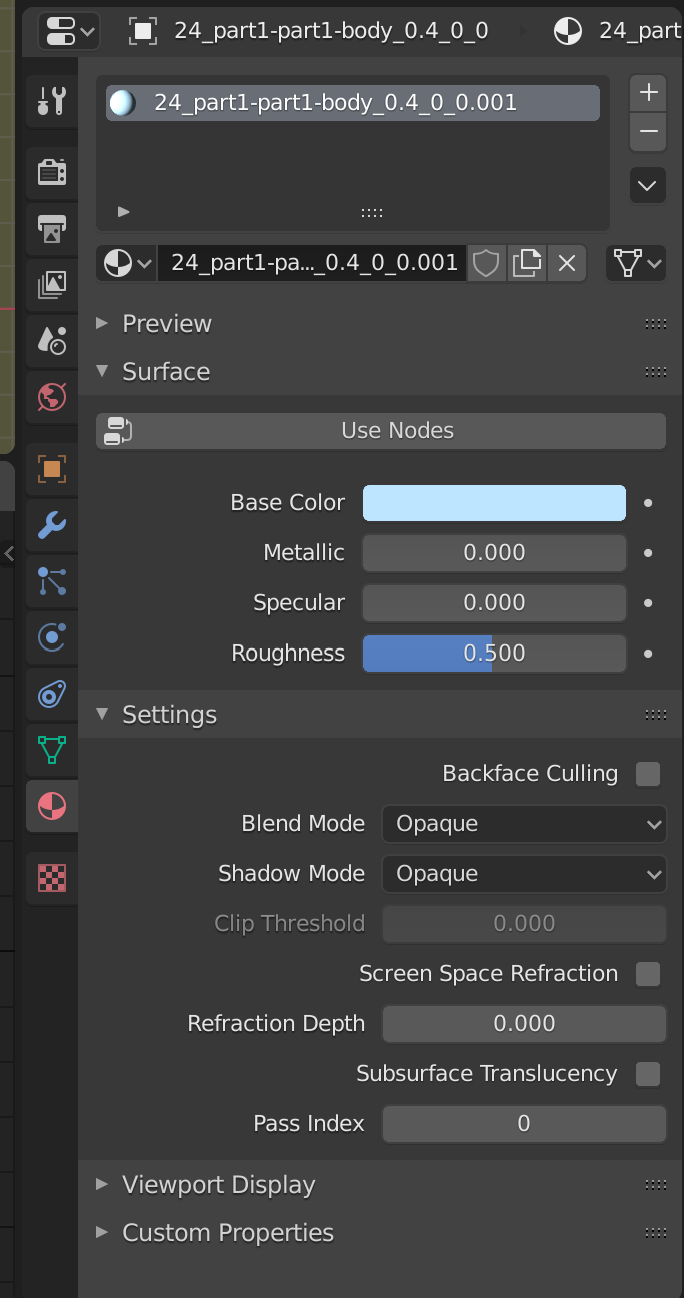
Under the Surface menu, you'll see a "Use Nodes" button. When you click this, you'll notice that the materials tab changes, as well as the bottom half of the Shading workspace. Blender has set up a Principled BSDF that we can start hooking up image textures and other data to.

The first thing we'll want to do is to set up the three Image Texture nodes we'll need, as well as one Normal Map node that we'll pass one of these textures through.
To add a node, you can press Shift + A, and in the popup menu, click on Search. You can then type out the name of the nodes, and position them like this:
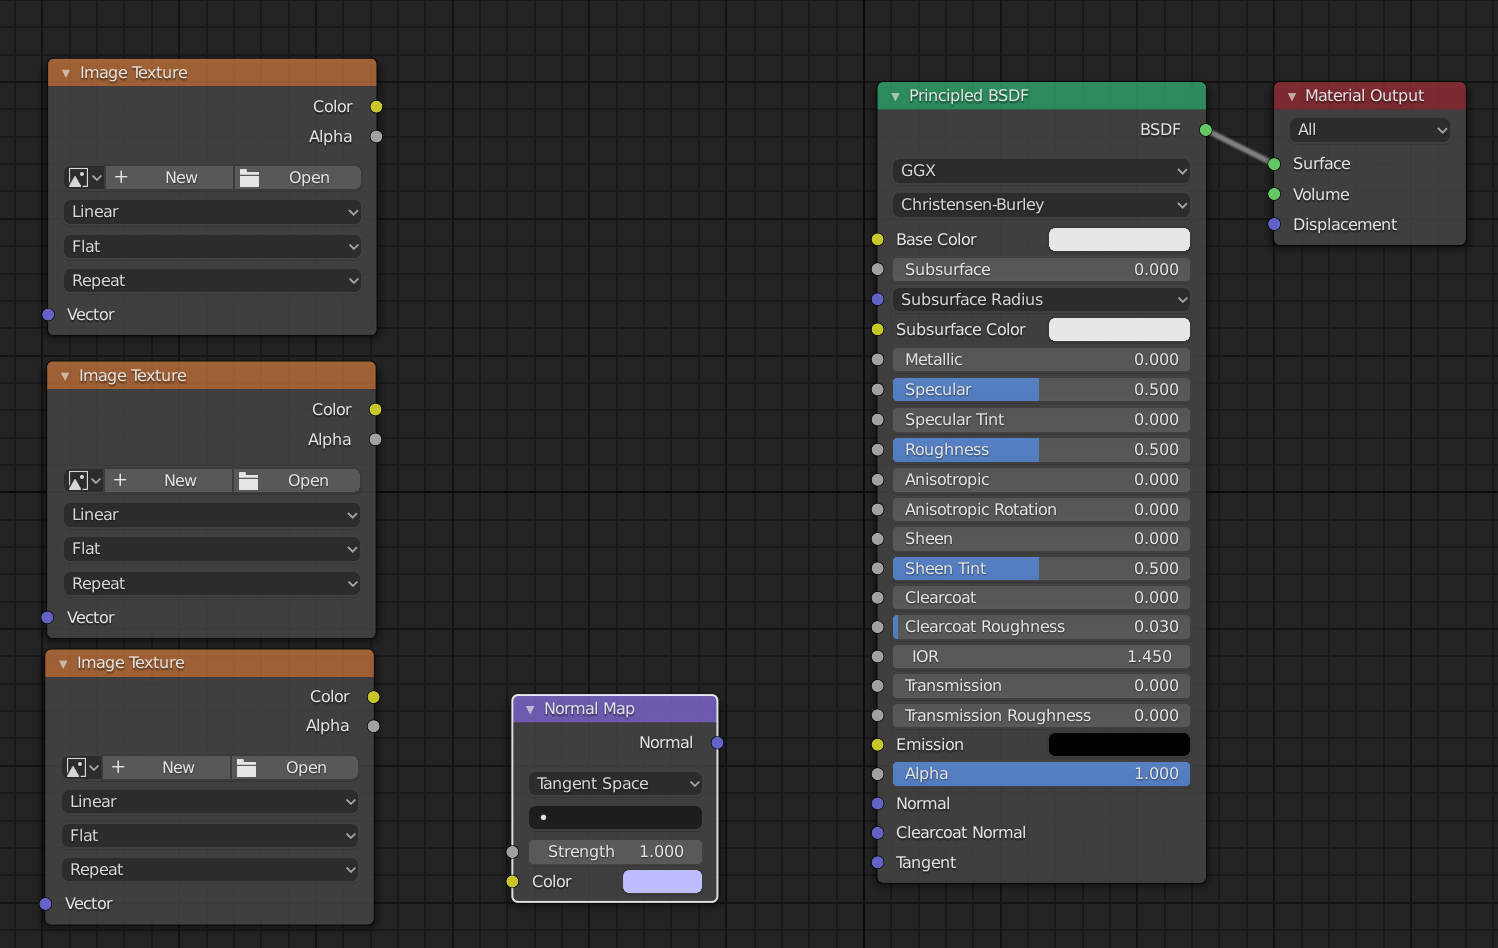
You can also place one Image Texture node, click on the node box, press ctrl/CMD + C to copy it, and ctrl/CMD + V to paste. It will paste directly over the first box, so you need to drag it down in order to see the second one.
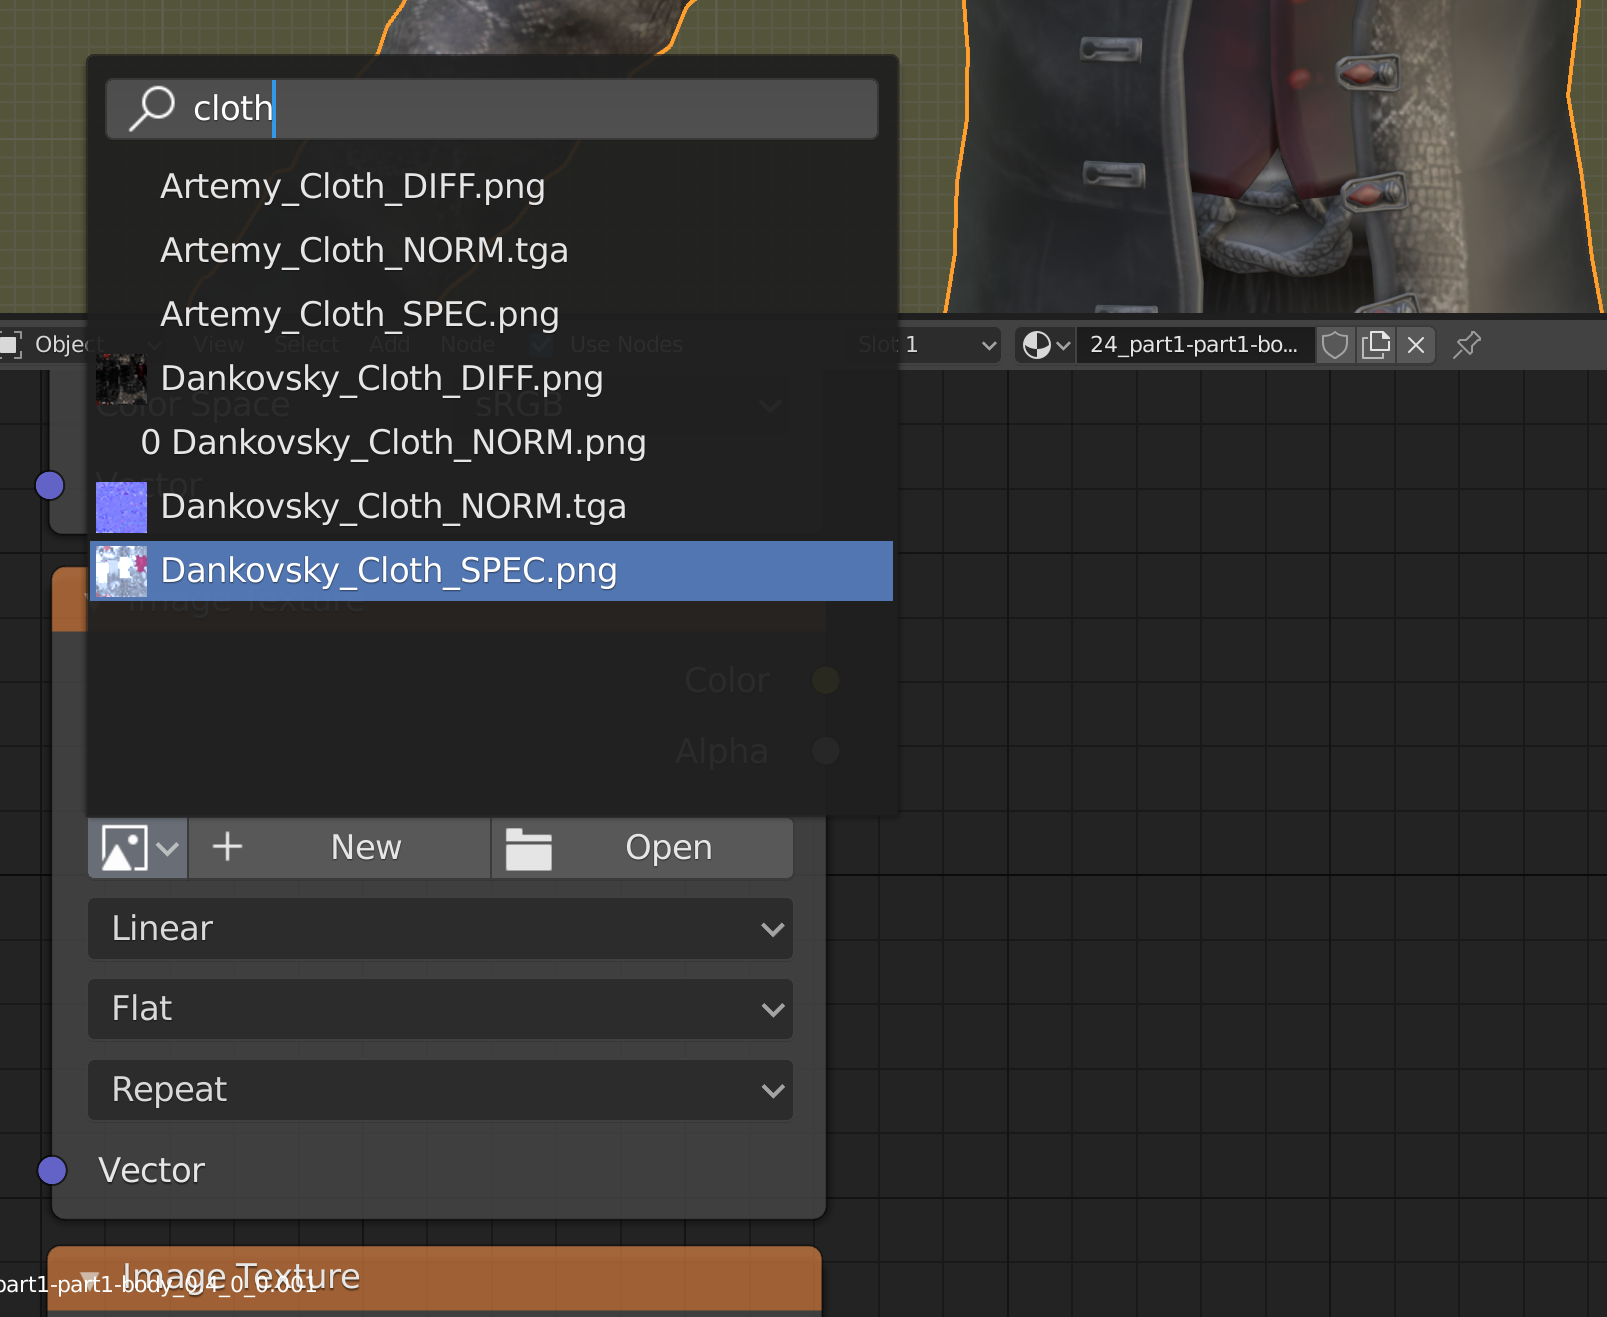
Now, we can start adding the different textures. I'll start with the diffuse. If you click on the first, smaller icon in the Image Texture node (square with dropdown arrow next to it), you'll get a list of textures in the folder we unpacked. If the textures you're looking for don't show up here, you maybe have to use the "Open" button to the right.
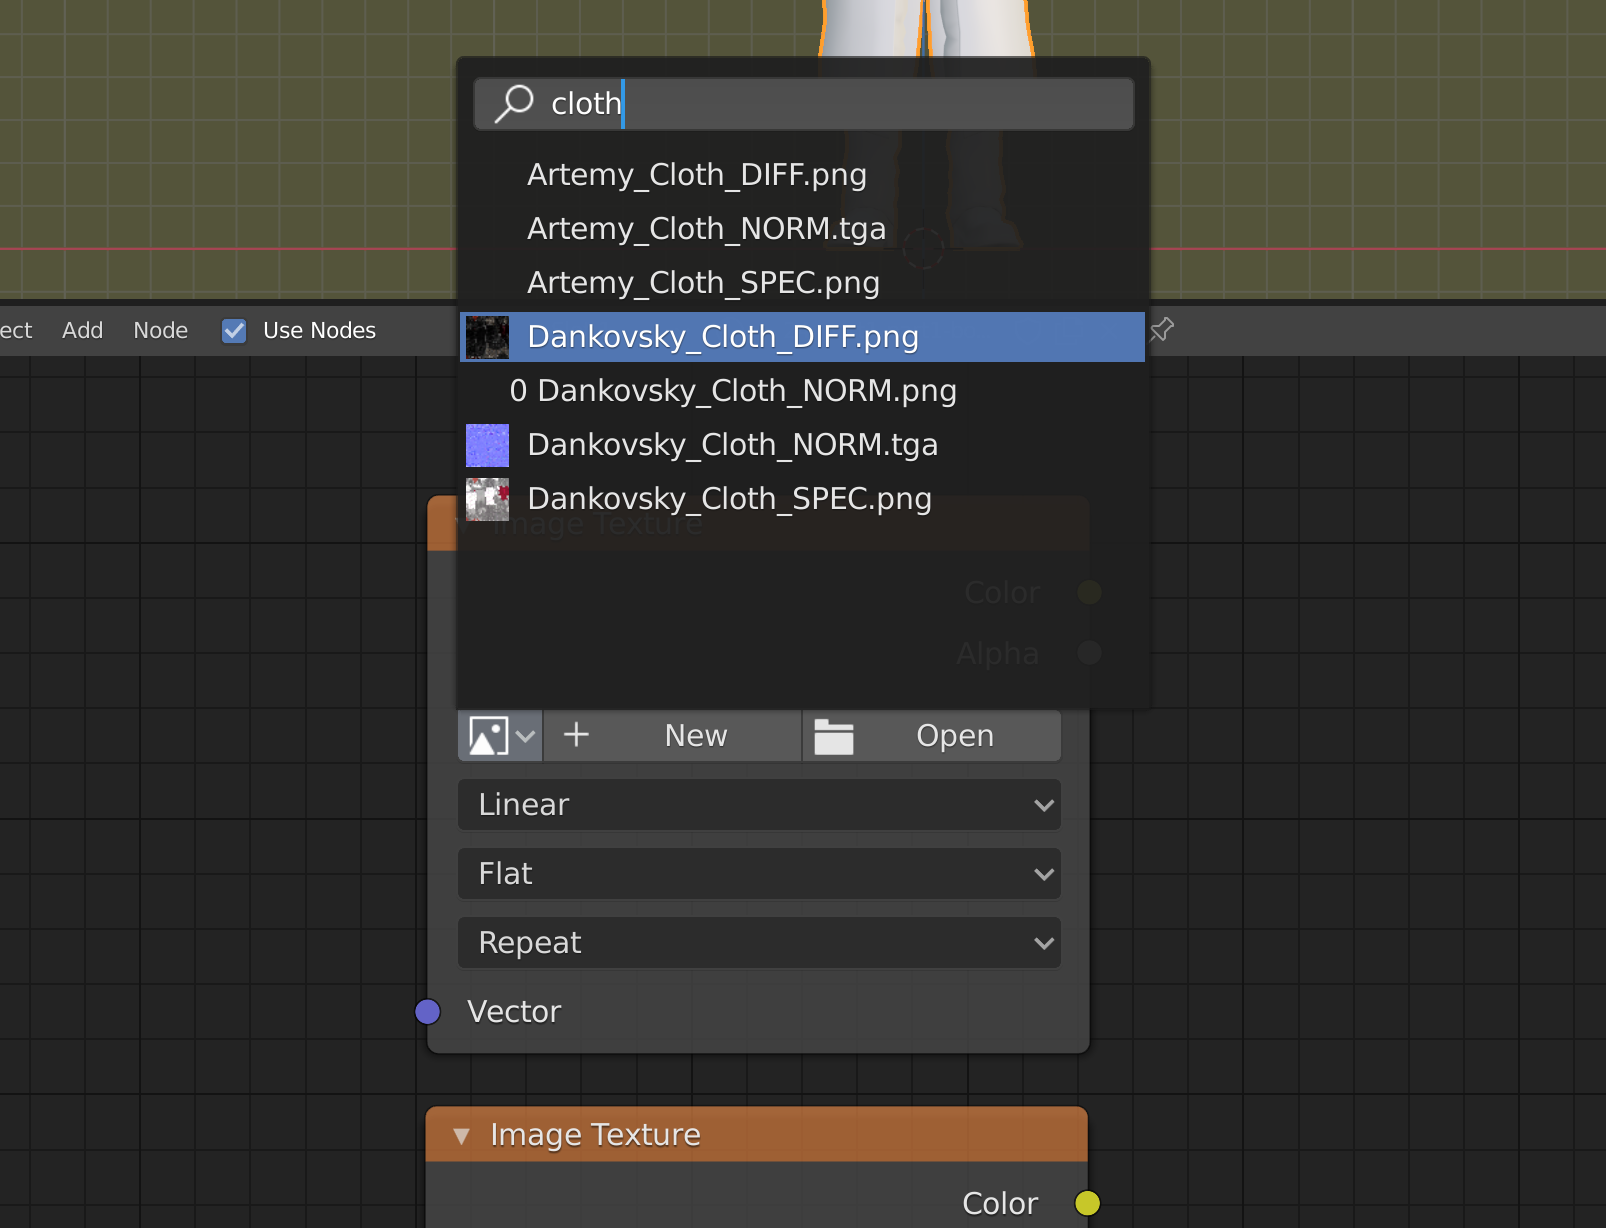
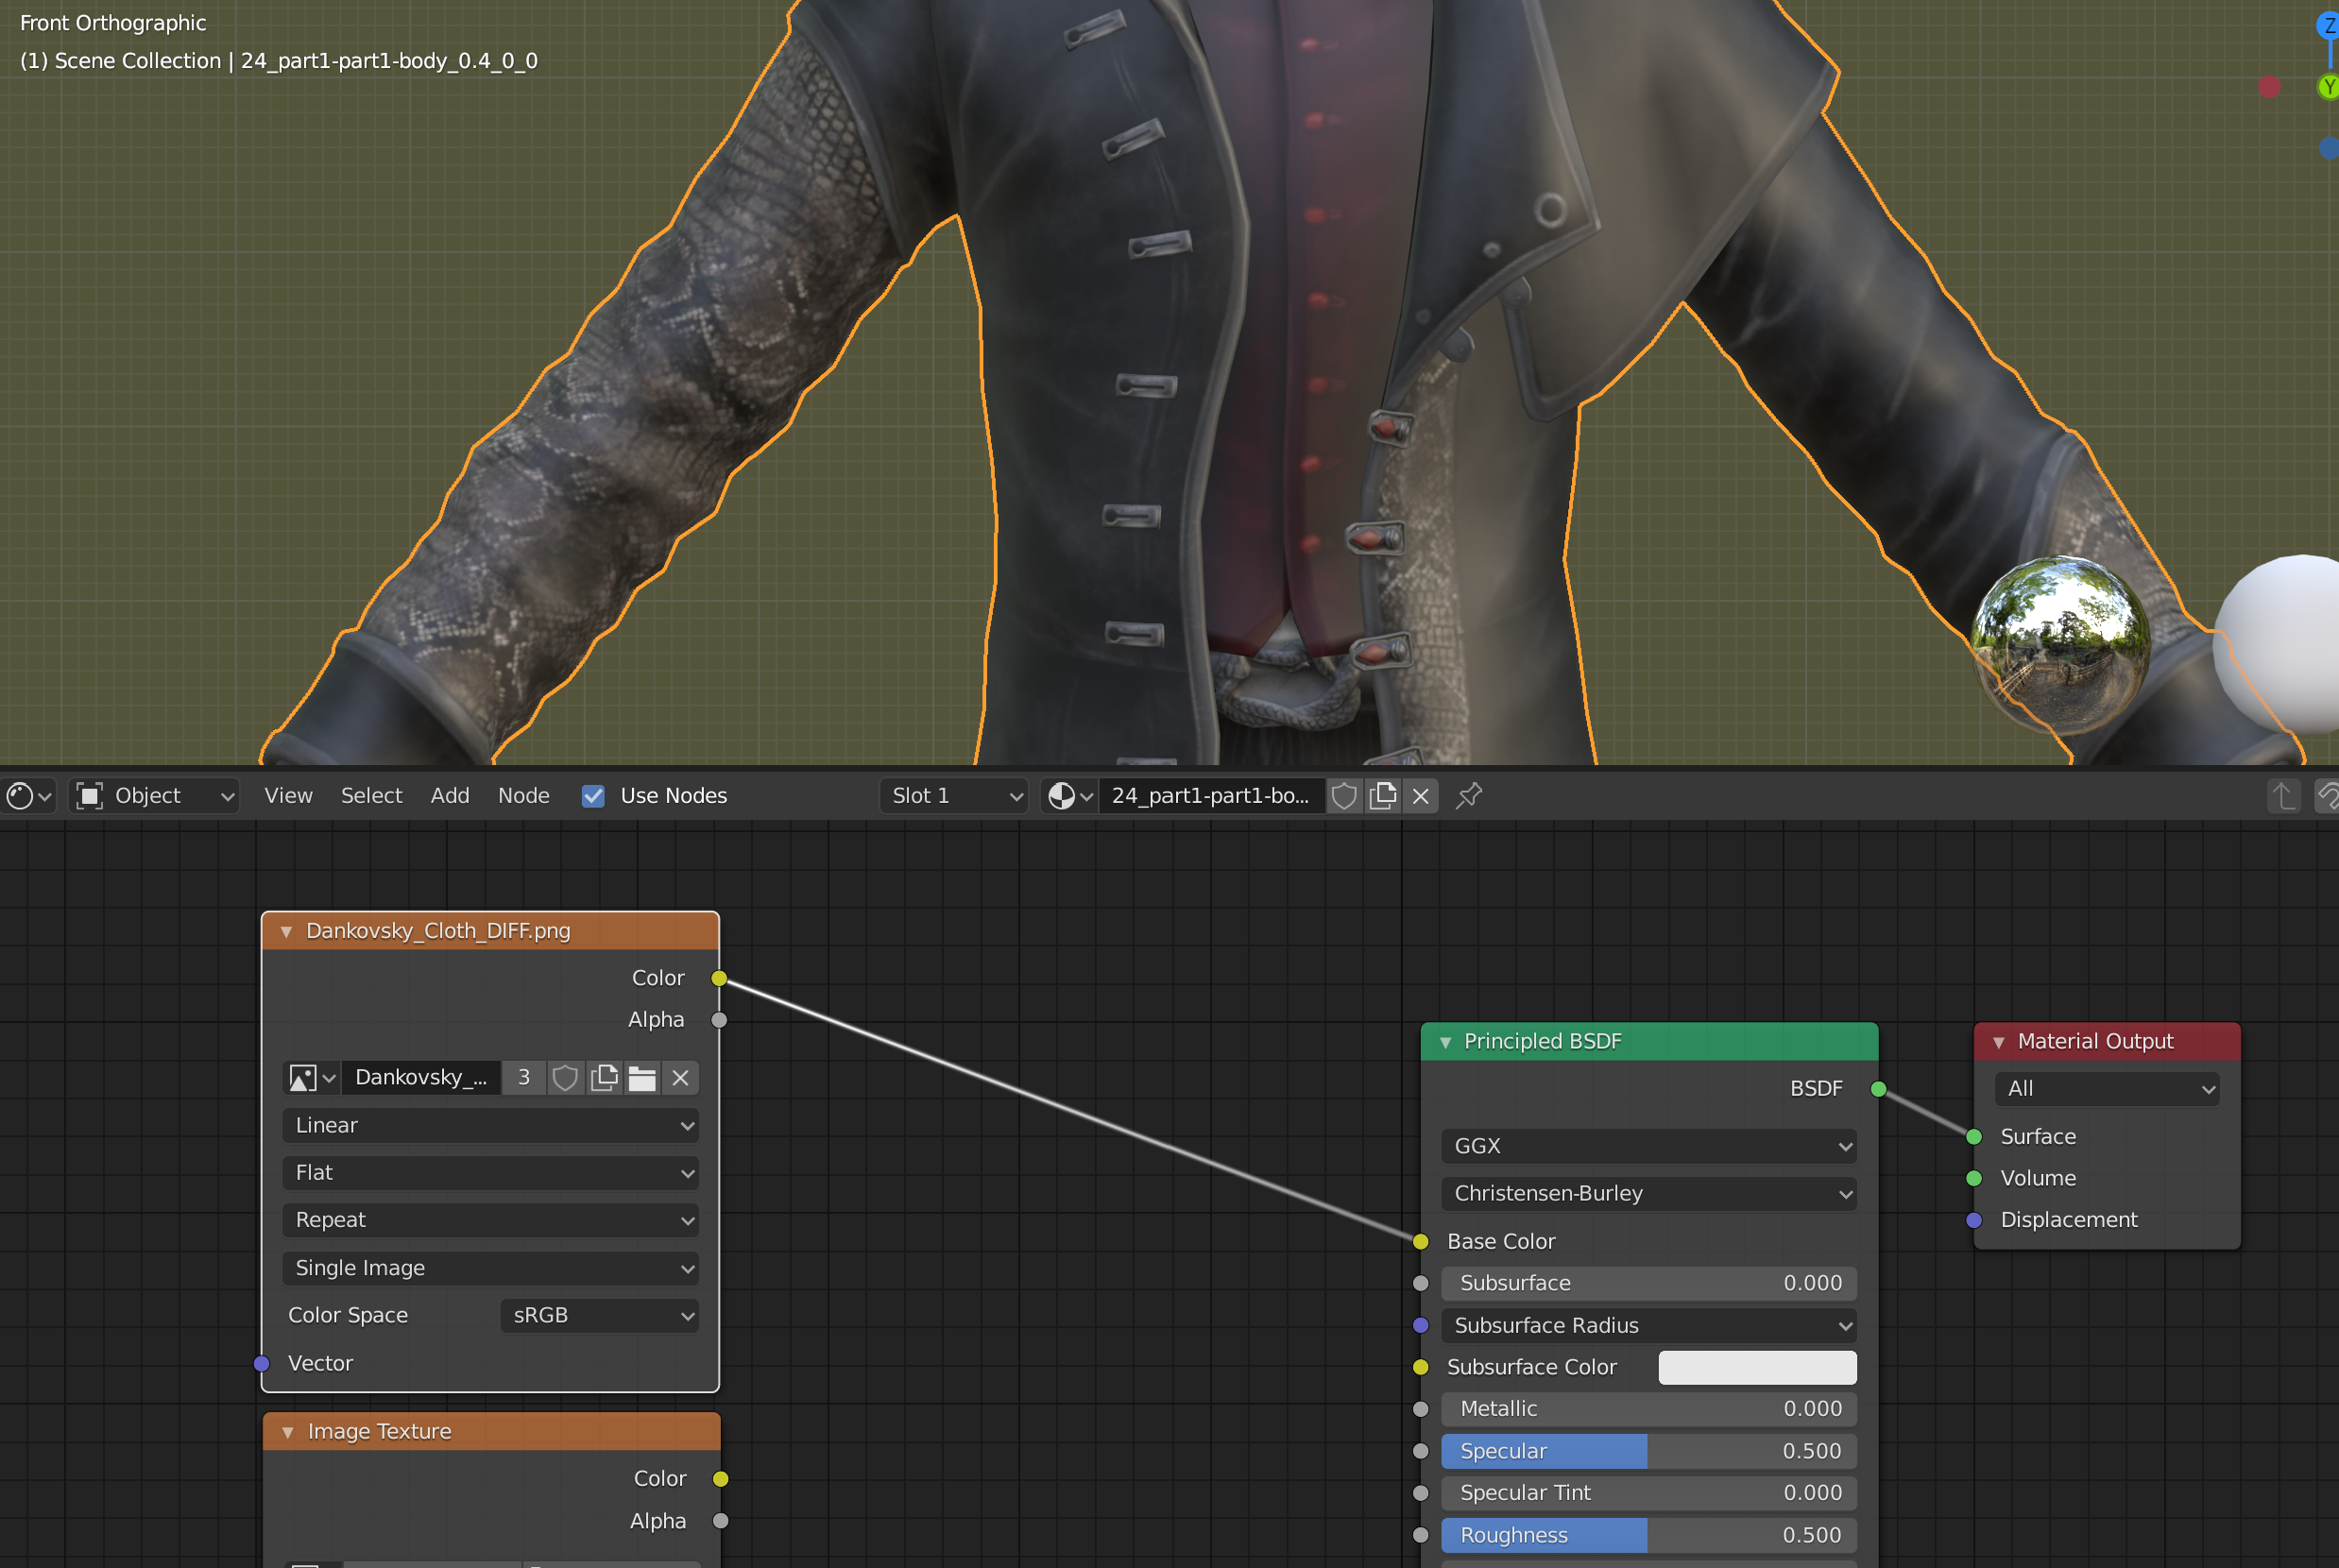
If you search "cloth" in this menu, you well get all of the textures associated with a character's clothing. You can select "Dankovsky_Cloth_DIFF.png" for the diffuse texture, and then you can drag the yellow Color output from the Image Texture node over to the yellow Base Color input on the BSDF.
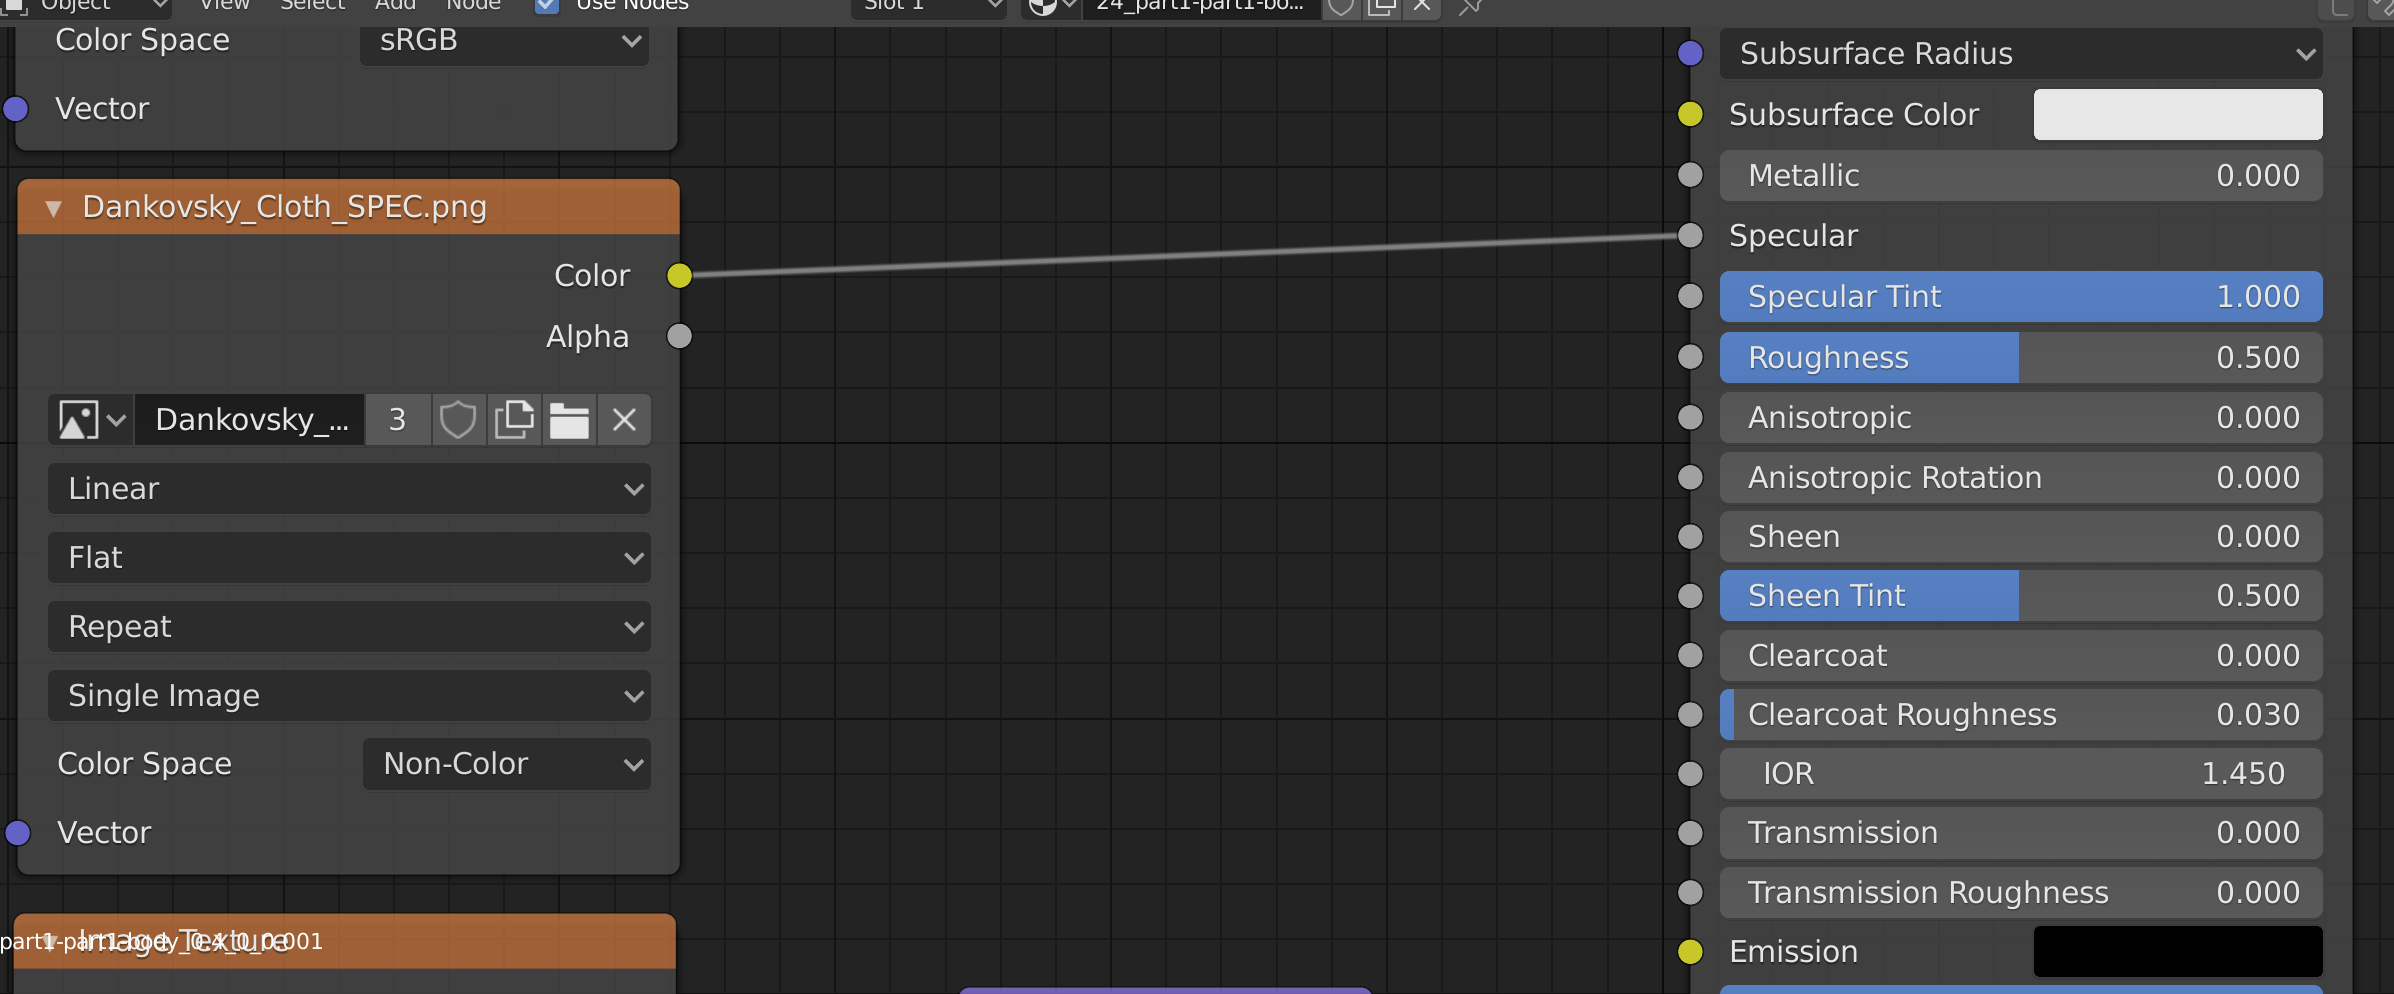
The specular texture is next. You can find it the same way as the diffuse, except this one is called "Dankovsky_Cloth_SPEC.png". You'll also want to set this to Non-Color in the Color Space section. Then, connect the yellow Color output to the to the gray Specular input in the BSDF.
You can raise the Specular Tint all the way to 1. You can also mess around with the Metallic and Rougness values if you'd like. If you need a model to be matte, you can change roughness to 1. You can also raise the Metallic value to 1 for more contrasting colors.

The last one we'll add is the normal map. You can find this one the same way as the last two textures, except this file is called "Dankovsky_Cloth_NORM.tga". I use the .tga file for the Pathologic 2 models, not the .png file. Set this texture to Non-Color, and connect the yellow Color output to the yellow Color input in the Normal Map. Then, connect the purple Normal output from the Normal Map to the Normal input in the BSDF.


Great! Now the coat is all set up. You can do the same thing for the skin, eyeballs, and mouth.
Some characters don't have specular or normal textures for each part. Others, like Andrey, Peter, and Clara, have additional parts like jackets or scarves. Some characters also have subsurface scattering and reflection textures for their skin and eyeballs, though it can be finnicky to get these to work.
The hair is pretty similar, except that it's transparent. Blender 2.8 and above uses a renderer called "EEVEE" that by default does not allow transparency. Unless you decide to use the Cycles renderer intead, you have to activate transparency on a case by case basis in EEVEE. I'll show you how to do that below.