Pathologic 2
Blender Model Tutorial
Update
You can now download the models through this Google Drive folder. Thank you to RoarkAnimations (Youtube, Twitter) for archiving these and allowing me to share them with everyone.
I've also added the Bachelor's retail model (different from the alpha model that rotten-eye had ripped), the Webley revolver, General Block, and the Polyhedron to that folder.
Summary
These pages contain information on how to download, unpack, set up, pose, and render rotten-eye's Pathologic 2 models in Blender.
If you'd like, you can also view the Pathologic 2 Character Turntables I've made using these models.
You can also view this tutorial as one page.
Table of Contents
- Software needed
- Downloading and Unpacking Models
- Setting Up Models in Blender
- Posing
- Rendering
- Output Settings
- Setting up Cameras
- Lighting with HDRIs / World Shader Nodes
- Animating a Turntable
- Rendering the Turntable
- Looping Turntables in Davinci Resolve
Rendering the Turntable
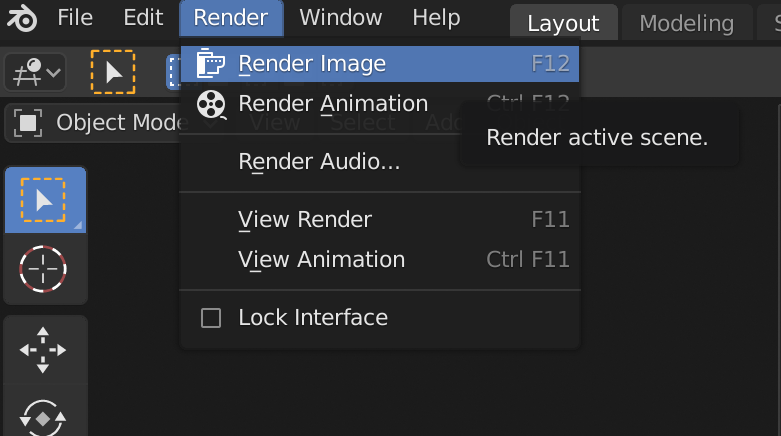
Before rendering the turntable animation, you may want to render a test image. This way, you can check if you've hidden all of the objects you want to hide, as well as making sure any lights and environment shaders are working properly. You can do this by going to Render / Render Image, or pressing F12.
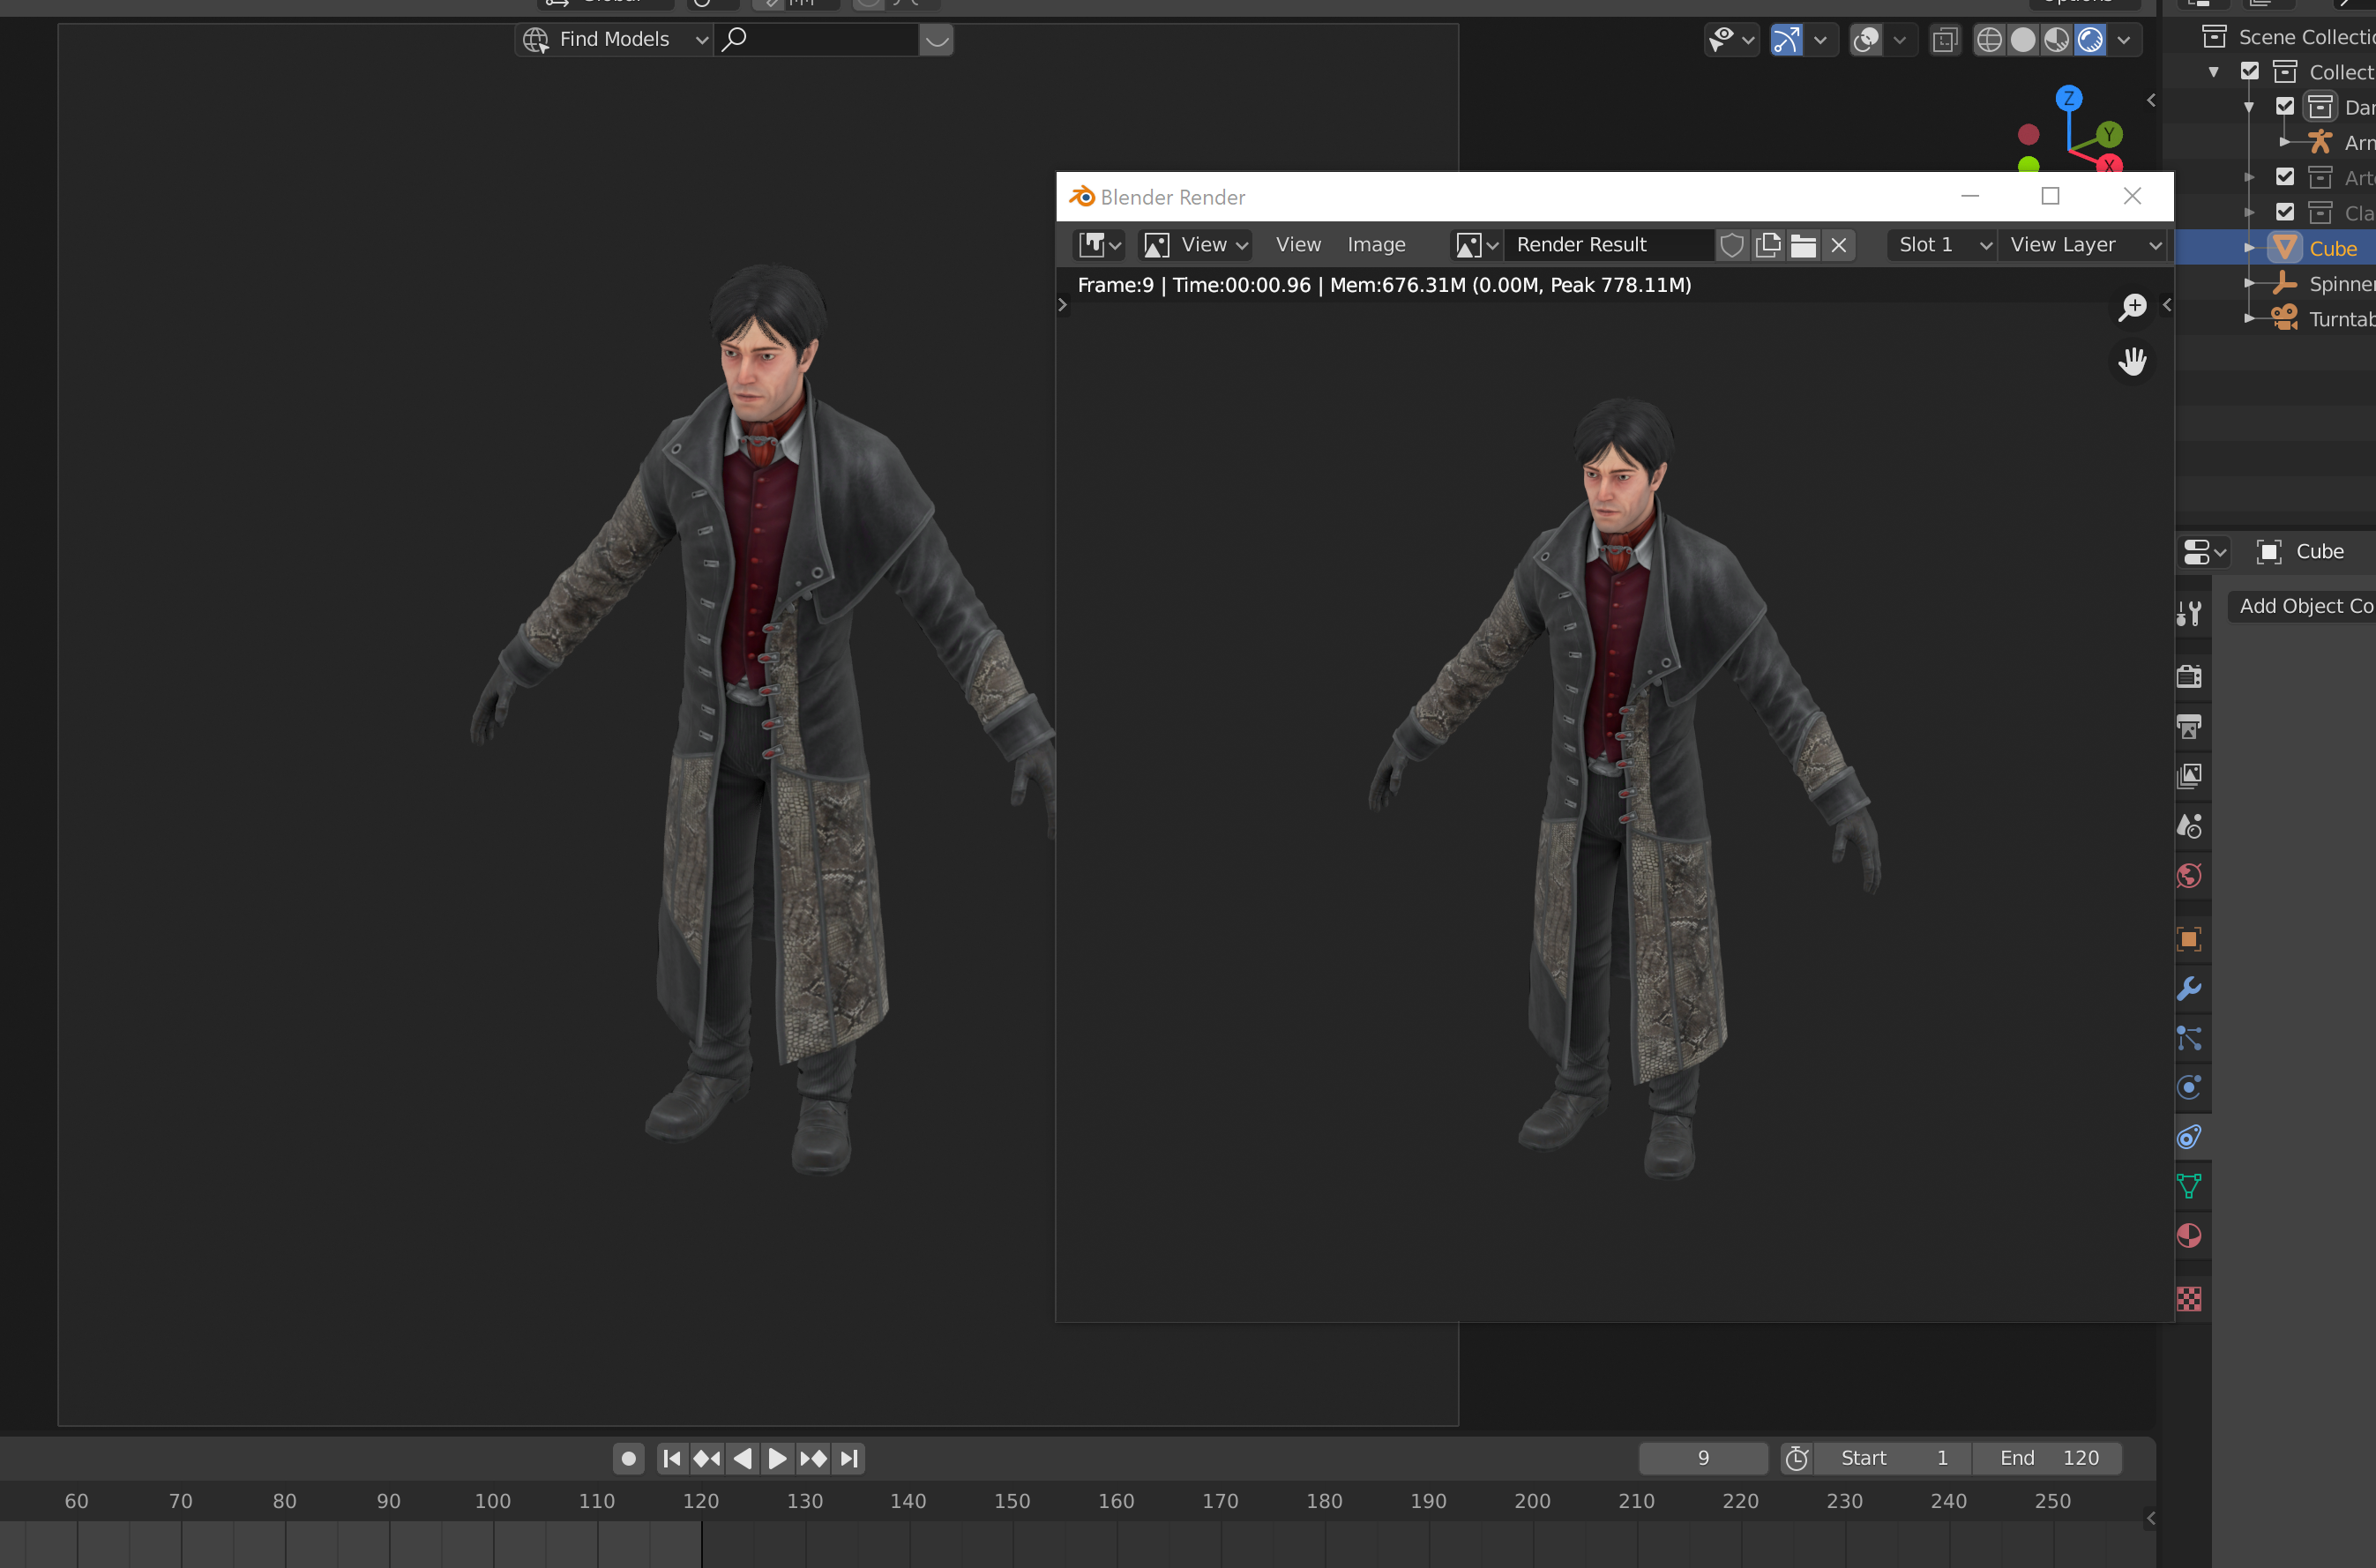
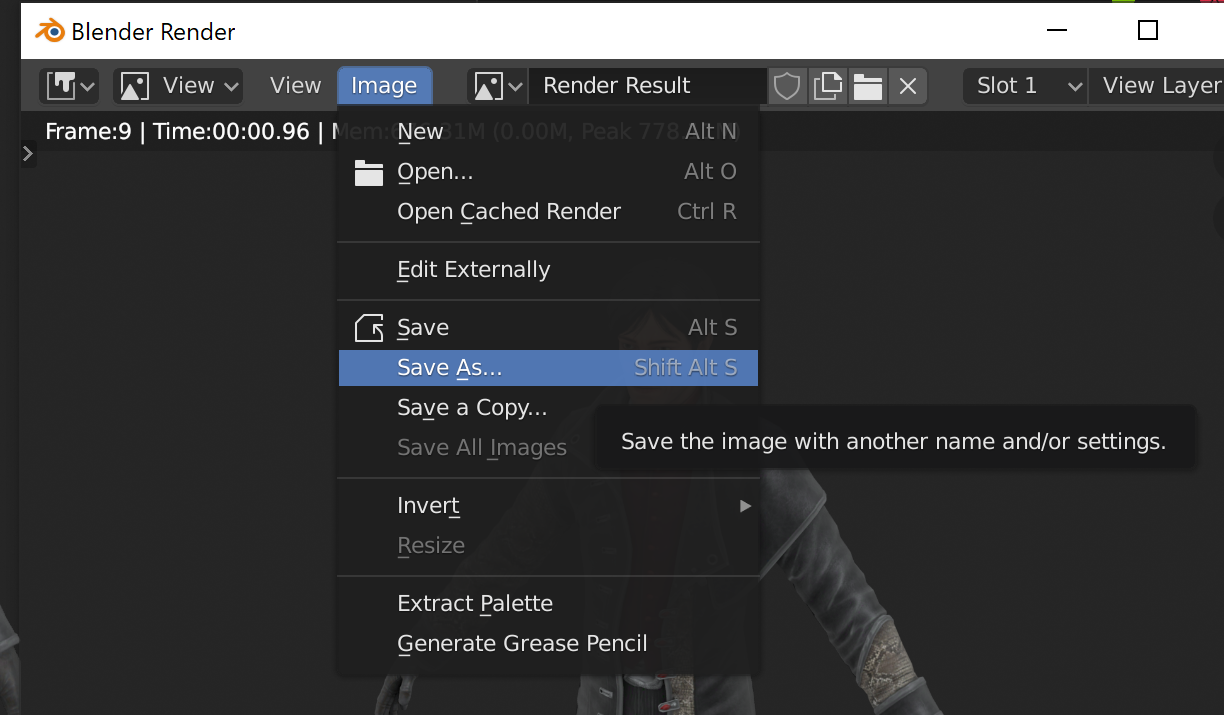
Looks good! You can save this render if you'd like by going to Image / Save As, and choosing where to save the image.
If you're ready to render the turntable, you can go to Render / Render Animation, or press ctrl/CMD + F12. Just make sure that you have the right output folder set up under the Output tab (gray printer icon 3 tabs down). Once rendered, you can find the individual image in the output folder, numbered by frame.
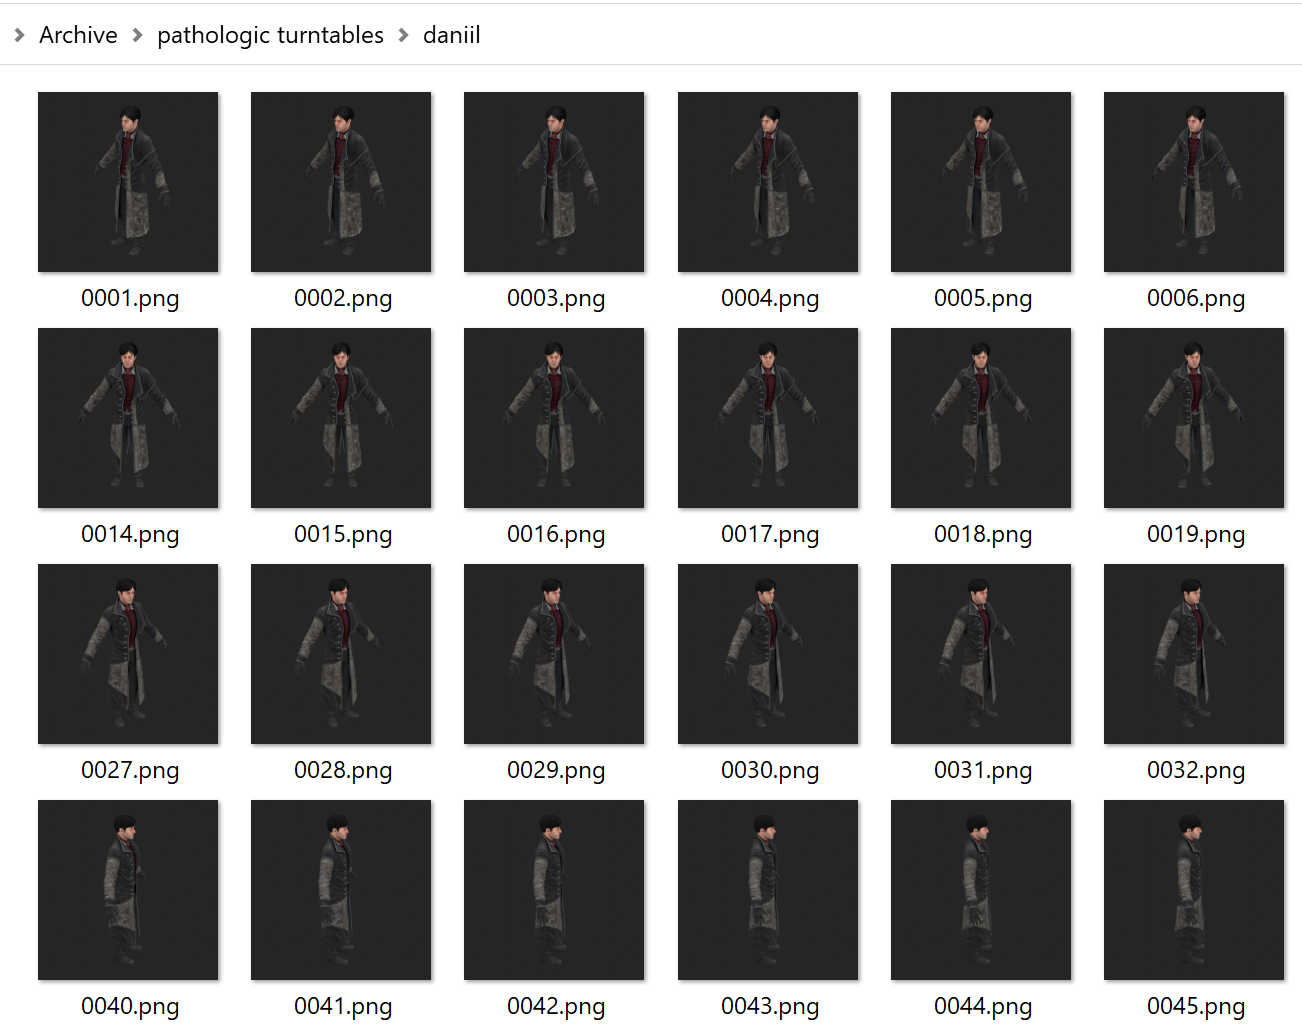
If Blender crashes in the middle of rendering an image sequence animation, you can resume on whatever frame you stopped by changing the Start frame on the timeline. For instance, if the last image I rendered successfully was "0059.png" (frame 59), I would start the timeline at frame 60, and resume rendering.